For those who have graced my dinner table or followed my Facebook journey, you’ve likely noticed my dessert offerings have been few and far between. However, with the arrival of my husband, Mr. Large, the question of “What’s for dessert?” has become a nightly ritual. Initially, I’d resist, insisting on a dessert-free zone. But Mr. Large’s persistence, often leading him to seek out store-bought ice cream, prompted me to rethink my stance.
Concerned about his health and my own, I embarked on a mission to create a healthier alternative to ice cream. The challenge was evident – desserts are inherently sweet, and sweetness often comes with added sugar. I recalled a nutritionist’s advice: sugar holds little nutritional value. So, what could replace it? Natural sweeteners like honey or fruit?
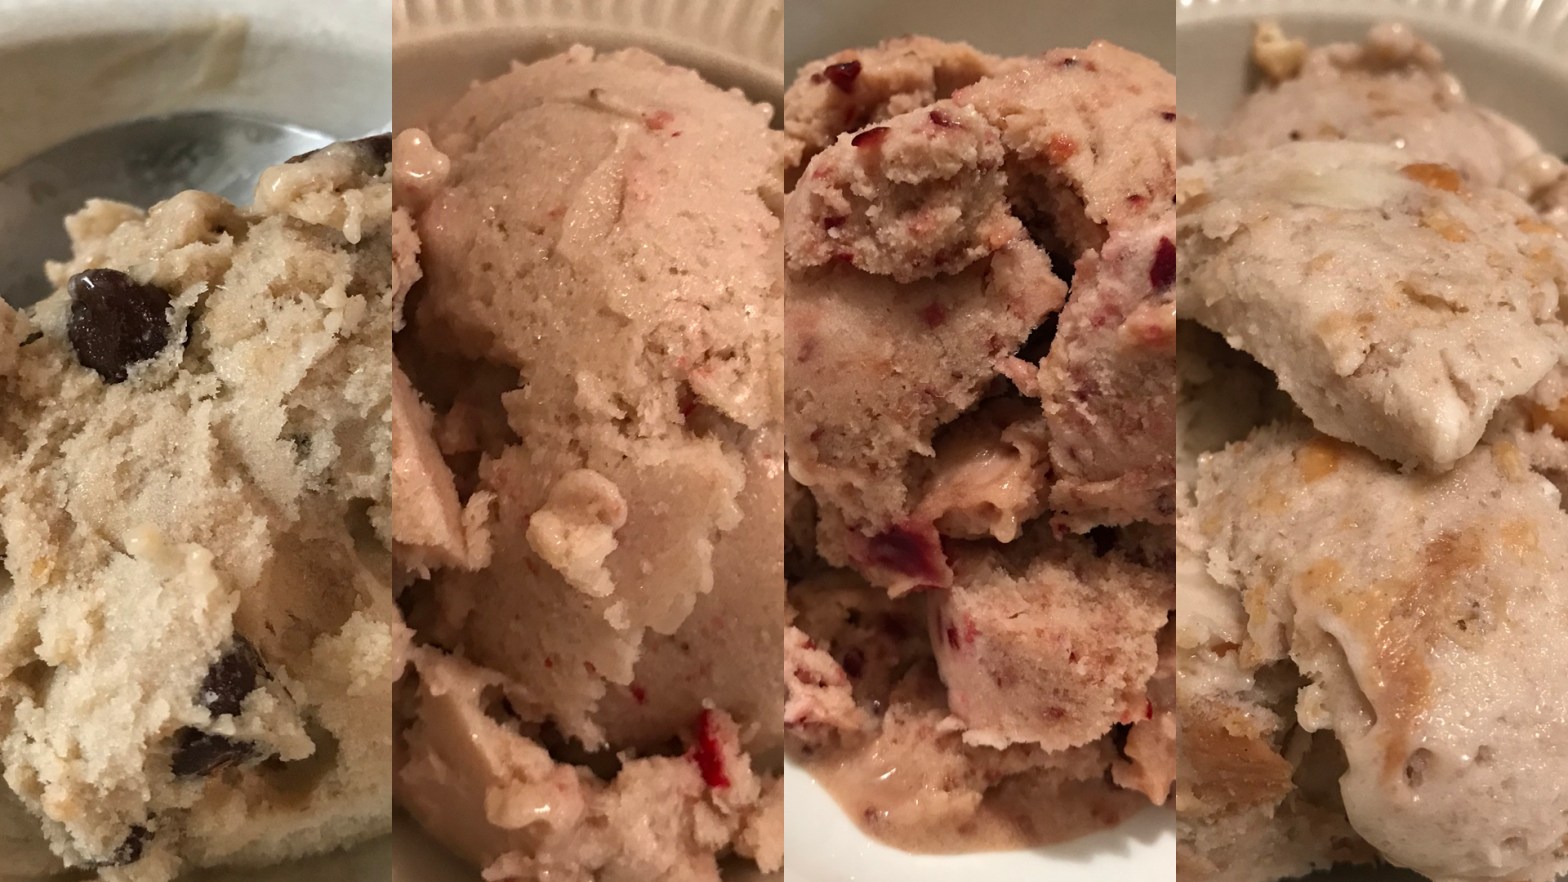
Through research, I stumbled upon the revelation that bananas could be transformed into ice cream without a hint of added sugar! Their natural sweetness, coupled with their smooth, ice cream-like texture, made them the perfect base. Simply blend bananas, add your desired toppings, and voila – a guilt-free treat was born. Keep in mind, these toppings can be your dessert’s angel or devil, but overall, this creation remains far healthier than traditional ice cream.
The health benefits of this dessert extend beyond its sugar-free status. Bananas, readily available and packed with nutritional goodness, offer a wealth of advantages: 這道甜點的健康不僅在於無糖,更來自於香蕉本身!香蕉不僅常見且營養豐富,具有多種益處:
Vitamin B6 Abundance: They support brain function and relaxation. 富含維生素B6:支持腦部功能,舒緩情緒。
Rich in Potassium, Low in Sodium: Bananas promote cardiovascular health. 高鉀低鈉:有助於心血管健康。
Fiber-Rich: They aid digestion and gut health. 富含纖維:促進消化,維持腸道健康。
Low GI Fruit: They maintain stable blood sugar levels. 低GI水果:穩定血糖。
❑ Any kind of Milk or Heavy Cream 任何一種牛奶或奶油 Two tablespoon 兩湯匙 (Optional 可以不加)
其它配料選擇 OTHER INGREDIENTS:
❑ Strawberries, Cherries or any kind of fruits 草莓,櫻桃,或各式水果
❑ Peanut butter, Honey, Any kind of nuts, Cocoa Powder, Chocolate Chips, or even Oreo! 花生醬,蜂蜜,各式果仁,可可粉,朱古力碎片,甚至是奧利奧!
做法 DIRECTIONS:
Slice the bananas and put them in the freezer for at least 3 hours 香蕉切片放冰櫃至少3小時
Blend the bananas together with milk or heavy cream in a food processor. Blend until it’s totally smooth. You need to be a bit patient as it will take some time. 把速凍好的香蕉片放入攪拌機,加牛奶或奶油,攪至順滑,這個步驟需要點耐性,要攪拌到如圖三裡的順滑程度才可以
When it’s blended until smooth, the ice-cream base is done. Then you can add whatever ingredients you like. 這樣冰淇淋底已經做好,再根據自己喜好加入其他配料。
After you add the other ingredients, put the mixture back in the freezer for at least 3 hours. 加入配料後,放回冰箱速凍至少3小時,這個無糖冰淇淋就大功告成了。
Customizing Your Banana Ice Cream 客製化你的香蕉冰激凌
Once you’ve chosen your toppings, remember that different ingredients may require different preparation methods. Nuts, for instance, should be ground before mixing, while peanut butter, honey, and chocolate chips can be simply stirred in. Fruits and Oreos, on the other hand, require blending. Match the preparation to the ingredient for a perfectly customized treat.
The Perfect Dessert for Health-Conscious Sweet Cravings 健康甜點的新選擇
This recipe is a godsend for those seeking a sweet yet healthy way to end their day. No more guilt-ridden indulgences – simply whip up a batch of sugar-free banana ice cream and savor the satisfaction of a guilt-free dessert!
Is traditional sweet rice cake difficult to make at home? There are so many things that Ms HK hasn’t tried and wanna try. Will she make it successful in her first trial? How to make the rice cake softly chewy?
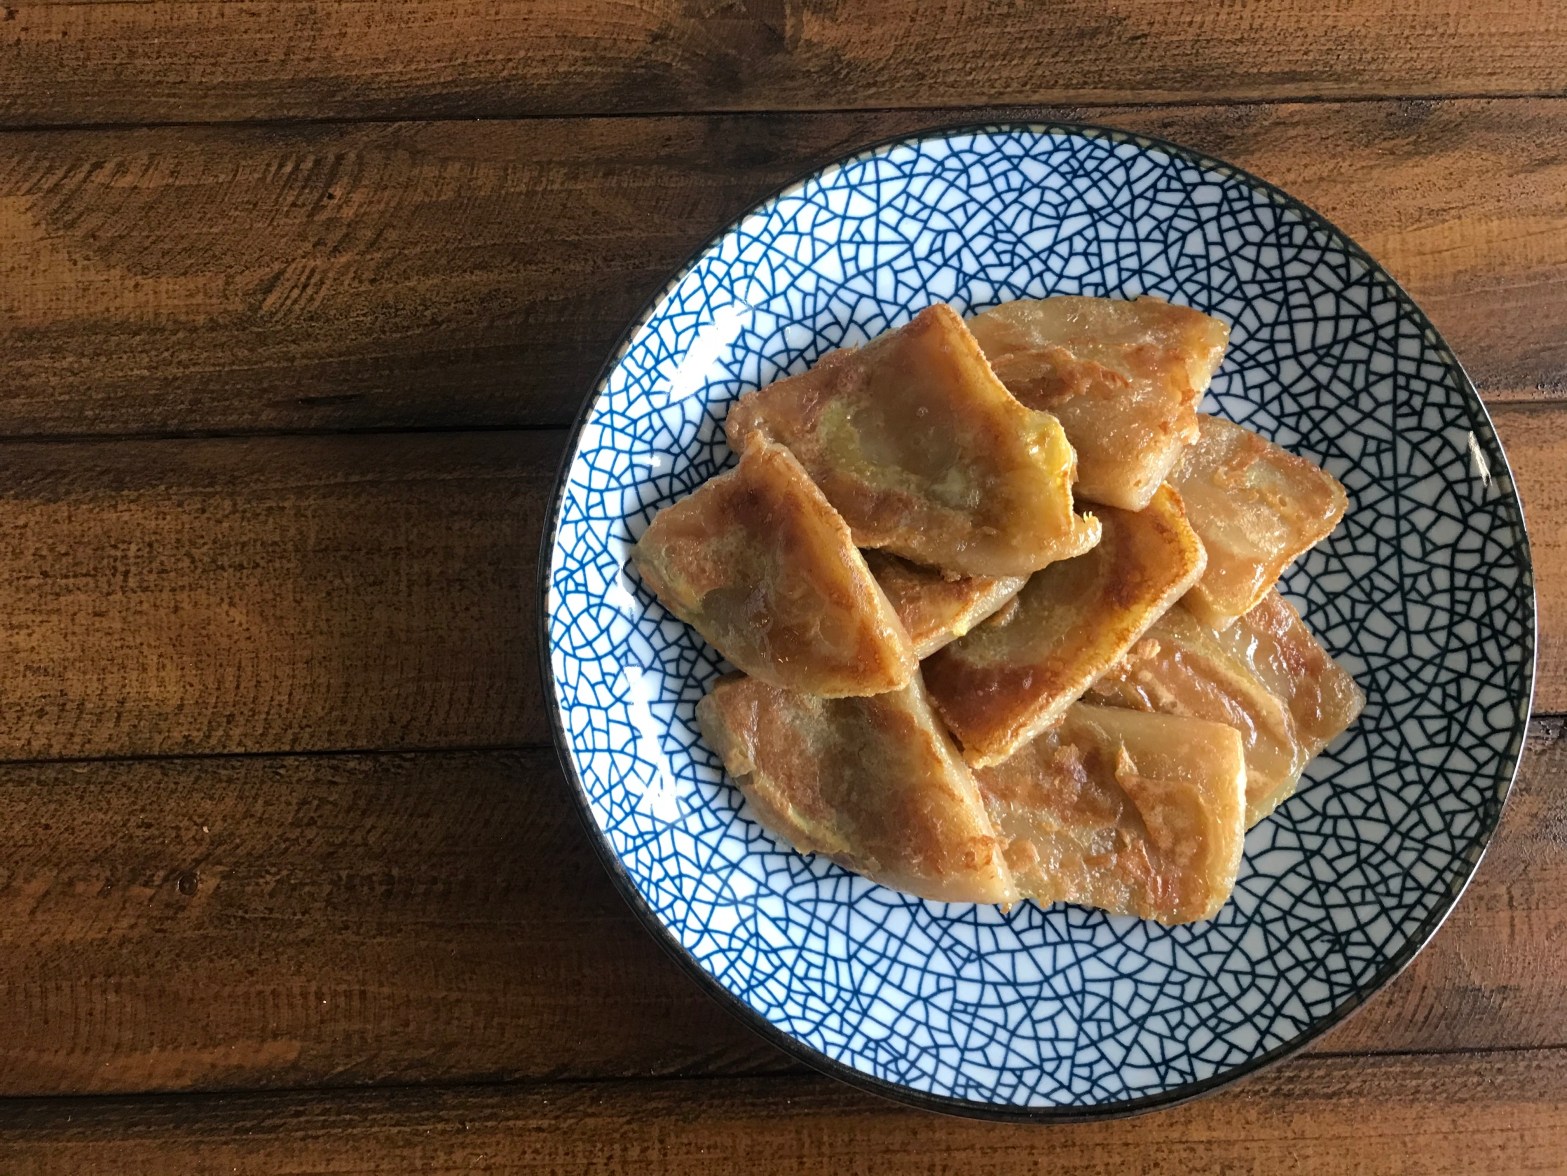
古法年糕 Traditional Sweet Rice Cake
份量 Servings
準備時間 Prep Time
烹調時間 Cook Time
難度 Difficulty
4inch pan
20 mins
60 mins
★★
材料 INGREDIENTS:
❑ 糯米粉 175克;175g Glutinous Flour
❑ 糖 100-120克;100-120g sugar (視乎自己喜歡的甜度 Depends on the sweetness you like)
❑ 水180毫升;180ml Water (可換成椰汁. Can be substituted with Coconut Milk)
❑ 油8克;8g Oil
做法 DIRECTIONS:
糖先用水(或椰汁)小火煮溶;Melt sugar with water (or coconut milk) in low heat
將熱的糖水加入糯米粉,先攪拌後,再用手揉成團,水的份量會超過一半,主要是能成麵團可以用手揉;Pour some hot sugar water into the glutinous flour. Stir well and then mix with hands. You will need more than half of the sugar water. Just add as much as you need to form a dough
成團後用手一直揉,大概10-15分鐘,揉的目的是讓糯米粉增加彈性;Knead the dough for about 10-15mins after a dough is formed. The purpose is to increase the flexibility of the dough and thus the rice cake will be soft but chewy
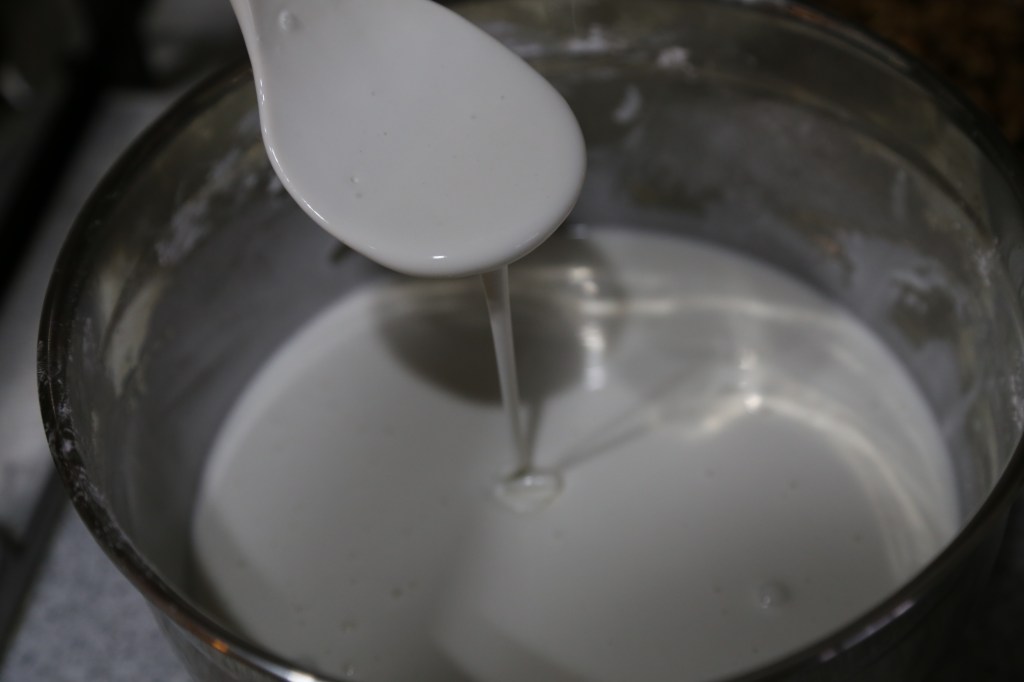
把剩餘的糖水,一點一點加,加一些用手繼續揉,一直到麵團變回粉漿,重點是粉漿不能油顆粒;Gradually add the rest of the sugar water in the dough and mix well. Add until the dough is back to a flour paste form. Key is mix it well until there is no crumbs.
加入油,攪拌均勻;Add oil and mix well
糕盤掃上油,倒入粉漿,用鋁箔紙包好,大火水燒開後,蒸1小時即可;Brush some oil in the pan. Pour in the flour paste. Wrap with aluminium foil. Boil water and steam for 1 hour
There are recipes online which they would add rice flour or even add wheat starch in a 1:1 proportion. Yet, based on this first trial experience, I don’t think there is any need for adding other flours. The key is to knead the dough long enough long. 10-15mins kneading is not that difficult (I will listen to some music. I’m not sure if this can be done by stand mixer). So, I strongly recommend ONLY use glutinous flour.
口味的話,我覺得可以根據個人喜愛去加,譬如椰汁,或者是薑汁。As for flavour, you can add anything you like e.g. coconut milk or even ginger juice.
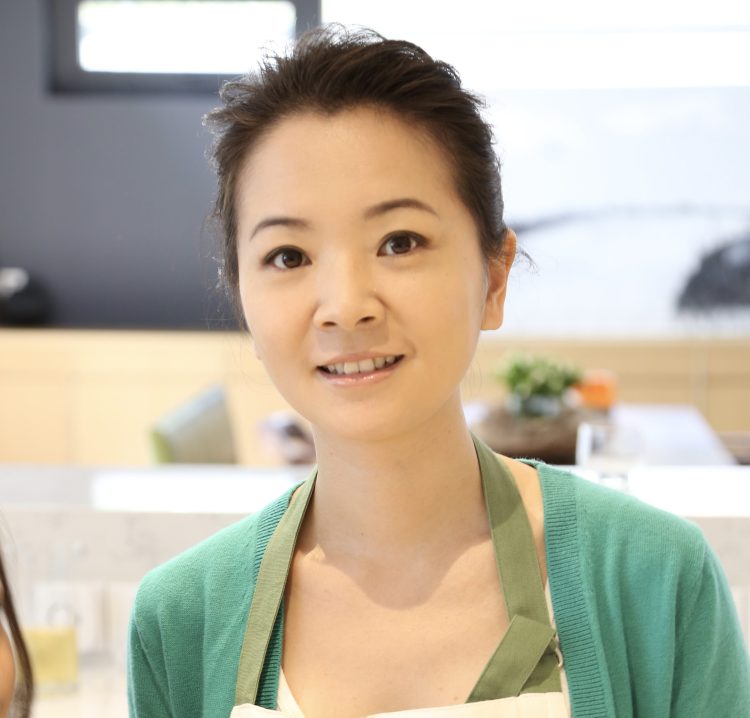
About Me
Hi, I’m Joyce. I’m originally from Hong Kong, passionate about food, cooking, and travel. Thanks for visiting! 我是Joyce,來自香港,熱愛美食、烹飪、旅遊,謝謝你瀏覽我的網頁!
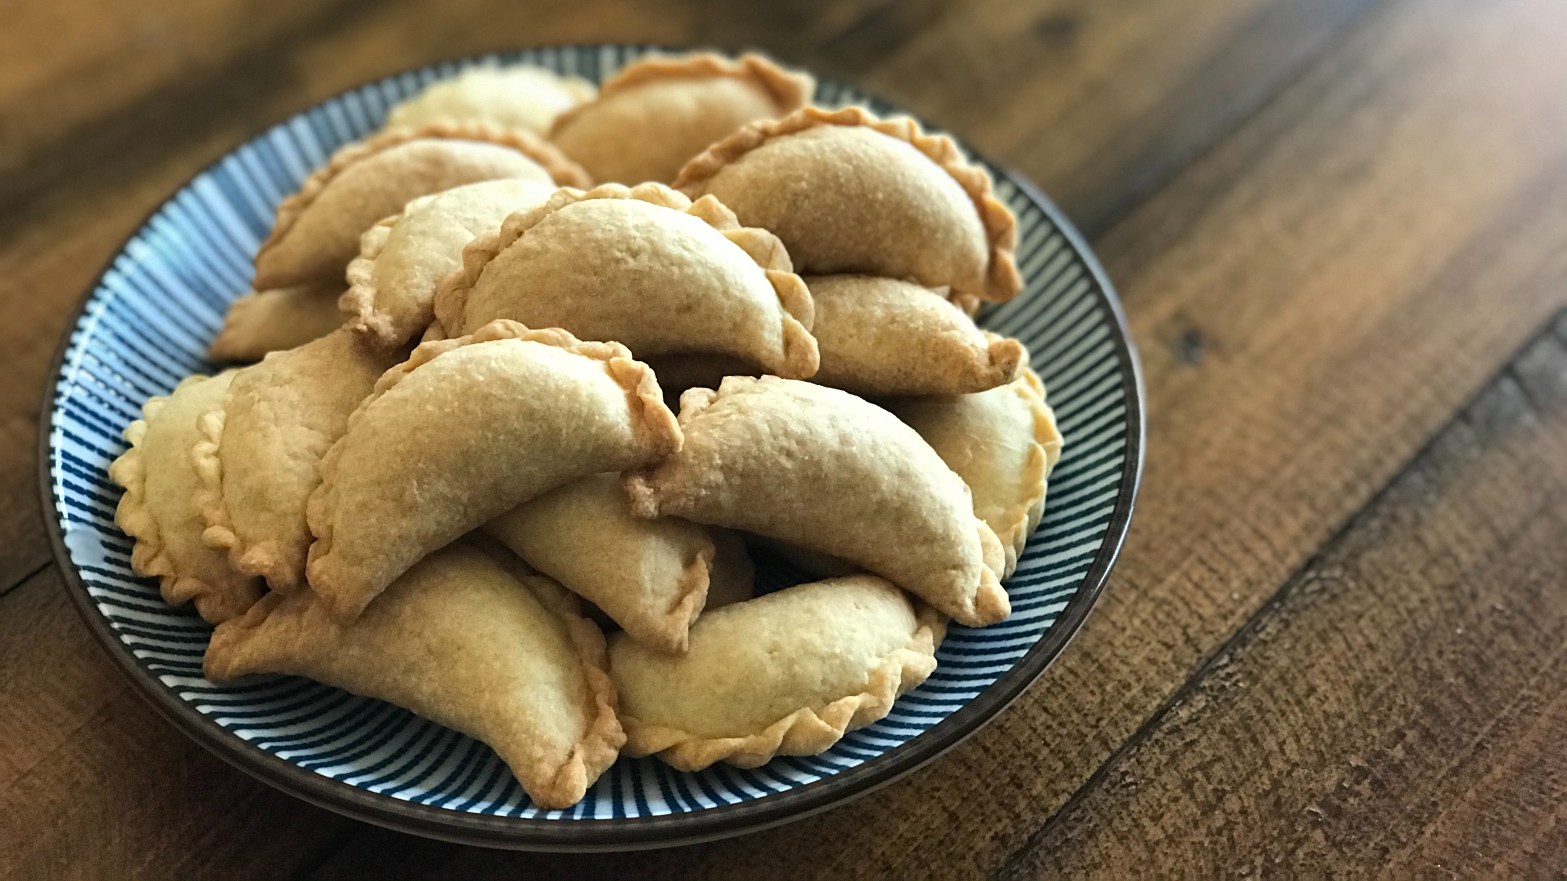
Chinese New Year (CNY) is coming soon. I believe that most of us need to stay home this year. Making some traditional Chinese New Year snacks perhaps is the best family activity! Chinese dumplings is one of the most traditional CNY snack. Traditionally, it’s made by lard and deep fried. I believe most of us are trying to seek for more healthy snacks nowadays. Ms HK has tested using three different types of oil to bake it (vegetable oil, butter and coconut oil). If you want to know which one tastes the best, you need to watch till the end of the video!
下面視頻分享一下這個小實驗的過程、經驗分享和結果,暫時不揭曉結果,大家點擊視頻看看!
I’ve made the below video to share the process, my experience and results from this little experiment. I’m not going to share the results now. Click and watch the video (bilingual subtitles).
先準備餡料,將餡料的材料混合好就可以;First, prepare the fillings. Simply mix well all the ingredients fillings
麵粉先跟糖和鹽混合好,再加入油分;Mix well flour with sugar and salt. Then, add oil
使用牛油的話,牛油必須是先冷藏好,要準備麵團時才切粒用手(或者攪拌機)跟麵粉混合成想麵包糠的質感,椰子油建議直接使用室溫固體狀(不用冷藏也不用微波加熱融化);If you use butter, the butter has to be cold and only taken out right before you start making the pastry dough. Cut the butter into small dices and mix with the flour with your hands (or using a blender) quickly until it becomes bread crumbs like. If you use coconut oil, I would suggest to solid form coconut oil in room temperature (no need to chill or melt in microwave).
加入雞蛋,開始輕輕的揉合,不要過度揉,麵團會起筋(尤其是如果你不是用低筋麵粉); Add egg. Gently mix everything together with your hands. Don’t over mix/knead (esp if you are not using cake flour)
視乎麵團的濕潤程度,決定是否需要加水/牛奶或麵粉;Depending on the wetness of the dough, decide whether to add water/milk or more flour.
牛油麵團需要先冷藏20分鐘才可以擀皮做角仔,其他麵團可以直接使用;If you are using butter, the pastry dough needs to be chilled for 20 mins before rolling the dough and start making the dumplings. For the other types of oil, you can work directly on the dough.
預熱烤箱350F;Preheat oven at 350F
麵團擀成2mm的薄皮,用2-2.5寸的圓形模,放一些餡料,對折,再包上花邊(這個部分最好看視頻!太難用文字描述了!);Roll the dough into about 2mm thick. Use a round shape cookie cutter to cut the dough. Fill with some fillings. Fold the round shape pastry and wrap with the boarders (Please watch the video for this part! It is too difficult to describe in texts!)
350F烤18-20分鐘;Bake at 350F for about 18-20 mins
實驗結果 Experiment Results
先公布誰勝出再分享這次實驗的一些體驗。Let me first share who is the winner and will share my experiment experience.
勝出者:椰子油!Winner: Coconut Oil!
這有點出乎意料之外,因為在做這個實驗之前除了請教李媽媽傳統的做法,也搜索和研究了一下坊間的食譜,大部分都是用牛油和植物油,椰子油是我自己的idea,想測試一下比較健康的油,沒想到西人和我一直認為椰子油做出來的最好吃!This is a surprise to me. I’ve done some research online (and of course consult Mama Lee). Butter and vegetable oil are most commonly used in the top recipes I found. Coconut oil is my own idea as I want to see if it works with a healthier oil.
先說說植物油的經驗,老實說,我有參考網上搜索出來最熱門的食譜,但整體做植物油的經驗非常差,麵團很油,不好包,沒法擀太薄,因此做出來的角仔的皮比較厚也因此比較油膩,雖然有烤成功,角仔是很脆(但是相對硬的那種脆),但整體經驗非常差,不推薦。The experience with vegetable oil is pretty terrible. Honestly, I’ve searched online and take reference from the most popular recipe using vegetable oil. However, the dough is super oily. It’s not easy to roll it thin enough as I wanted. It’s also hard to wrap. Even though it’s successfully baked and the dumplings are crispy (a bit of hard crispiness). Yet, it tastes ok but a bit oily. Do NOT recommend!
用牛油做的皮的體驗就非常好(三個中最好),整體就跟一般用牛油做烘焙差不多,麵團手感非常好,很柔軟,很容易處理,不管是擀還是包都非常的流暢,做出來的角仔也很鬆化好吃,基本上是在預期之內。The experience working the dough with butter is excellent (the best). It’s similar to other bakery experience using butter. The hand feel of the dough is very good. It’s soft and easy to manage no matter in terms of rolling and wrapping. It tastes good as expected and very crumbly crispy.
用椰子油做的皮的體驗介乎牛油和植物油之間,這可能是因為我參考了其他用椰子油做烘焙的食譜,先把椰子油用微波爐低溫融化成液體,因此我讓麵團在冰箱休息了10分鐘左右,麵團就很好處理了,麵團在後面擀和包都很好弄,跟牛油皮差不多,因此結論建議使用椰子油的話,直接使用室溫固體狀。椰子油做出來的角仔味道完勝!不僅僅鬆化,而且帶有椰子的香味,雖然牛油皮也是很好吃,但還是比不上椰子油皮。The experience working the dough with coconut oil is somewhat in between butter and vegetable oil. This is perhaps because I melt the coconut oil in microwave with low heat taking reference with some other bakery recipes. The dough is a little oily and so I needed to rest it in the fridge for 10 mins. The dough then was very easy to manage in terms of both rolling and wrapping. Similar to the butter dough. Thus, I would suggest to directly use the solid form coconut oil in room temperature. In terms of tast, the coconut oil one is the best. It’s crumbly crispy but also with very nice coconut flavor!
重要提醒 Important Reminders:
麵粉用all purpose就可以,低中筋也型但不要用高筋;All purpose flour is fine as well as cake flour. No bread flour please!
烤箱溫度不要調高,尤其是用初榨椰子油(椰子油的冒煙點是350F),建議350F或以下,如果調低時間要長一下,我測試過牛油皮用375度烤 14-15分鐘,做出來雖然顏色要比較金黃,但是感覺比較乾,當然也是在測試可能時間需要再縮短;Do not suggest to increase the temperature of the oven esp if you use virgin coconut oil (its smoke point is 350F). Keep it as 350F or below. If you lower your temperature, you need to bake slightly longer. I have tested using 375F for 14-15 mins with butter pastry dough. The dumpling is more golden brown BUT it is a bit dry. Of course, I’m still testing and so perhaps need to further cut down the baking time.
About Me
Hi, I’m Joyce. I’m originally from Hong Kong, passionate about food, cooking, and travel. Thanks for visiting! 我是Joyce,來自香港,熱愛美食、烹飪、旅遊,謝謝你瀏覽我的網頁!
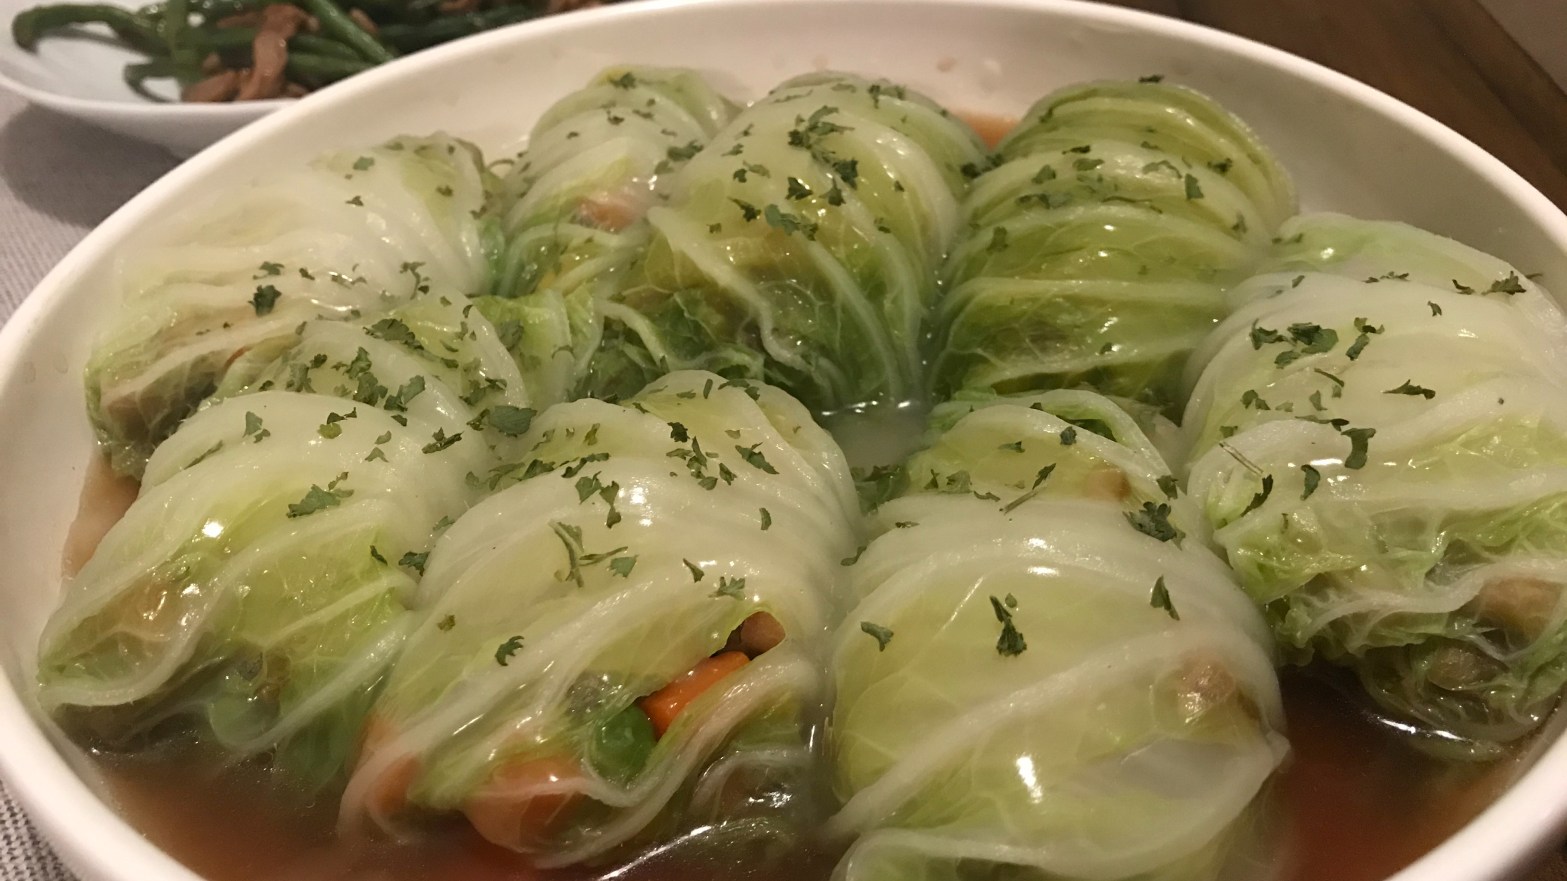
Chinese New Year is coming. Although you probably can’t get together with your relatives and friends this year due to COVID-19, you can also prepare some nice dishes at home for the new year. This cabbage rolls dish is delicious and healthy! You can also choose whatever ingredients that you like. Let’s try this during the new year!
白菜雞肉卷 Stuffed Chinese Cabbage Rolls
份量 Servings
準備時間 Prep Time
烹調時間 Cook Time
難度 Difficulty
2
30 mins
30 mins
★★
材料 INGREDIENTS:
❑ 大白菜8片;8 pieces of Chinese Cabbage Leaves
❑ 雞腿肉一塊(大概200克);1 piece of Chicken Thigh (around 200g)
❑ 雜菜一碗;1 bowl of Mixed Vegetables
調味 SEASONING:
❑ 醬油一湯匙:1 Tbsp of Soy Sauce
❑ 米酒半湯匙;1/2 Tbsp of Rice Wine
❑ 麻油少許:A little of sesame oil
❑ 糖少許:A little of sugar
❑ 粟粉半茶匙:1/2 Tsp of cornstarch
醬汁 SAUCE:
❑ 雞湯半杯;1/2 cup of Chicken Broth
❑ 糖鹽麻油各少許;A little of salt, sugar and sesame oil
做法 DIRECTIONS:
雞腿肉去皮去骨,切粒,加入所有調味料,醃製15-20分鐘;Remove skin and bone of the chicken thigh. Cut into small cubes. Add all seasoning and marinate for 15-20 mins
大白菜葉洗乾淨,用熱水先煮軟,放涼備用;Wash the Chinese cabbage leaves and cook them until soften in water. Let it cool and set aside.
中火燒熱油,加入雞肉粒,炒熟,再加入雜菜炒勻,盛起放涼備用;Heat up some oil in medium heat. Add chicken and stir fry until it’s cooked. Then add mixed vegetables and stir well. Let it cool and set aside.
每片白菜加入適量雞肉餡料,捲起來,放在盤裡;Wrap each cabbage leave with some chicken filling and place them in a plate
燒熱水,雞肉卷隔水蒸15分鐘;Boil some water in a pan. Put the chicken rolls plate on the rack. Steam for 15 mins.
把醬汁放進一個小湯鍋,先煮熱,再加粟粉水煮至濃稠;Heat up the sauce in the sauce pan. Add cornstarch to thicken the sauce
雞肉卷蒸好後,淋上醬汁即可;Pour the sauce on the chicken rolls
About Me
Hi, I’m Joyce. I’m originally from Hong Kong, passionate about food, cooking, and travel. Thanks for visiting! 我是Joyce,來自香港,熱愛美食、烹飪、旅遊,謝謝你瀏覽我的網頁!
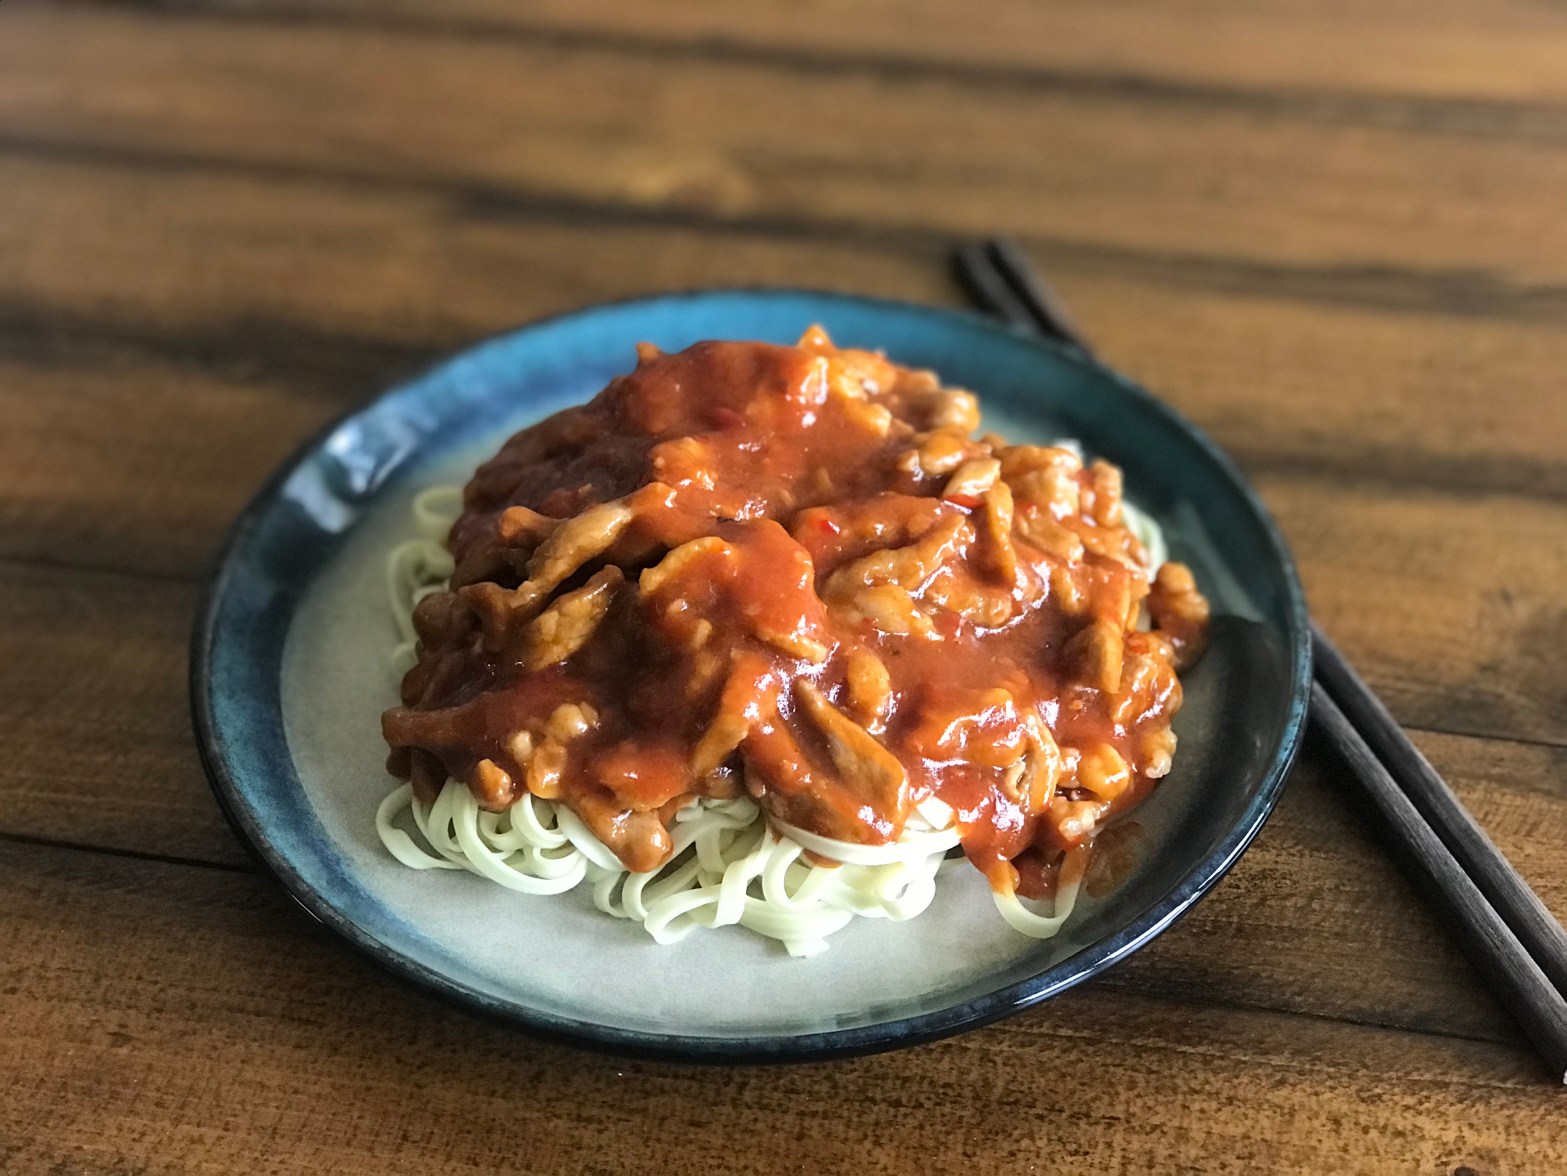
Out of all traditional HK style Lo Mein, this HK Style Zha Jiang Noodles is my favorite. It’s a little spicy, sweet and sour. It’s actually pretty easy to make at home. You can get it done by 30 mins! It’s very suitable for those who are now WFH.
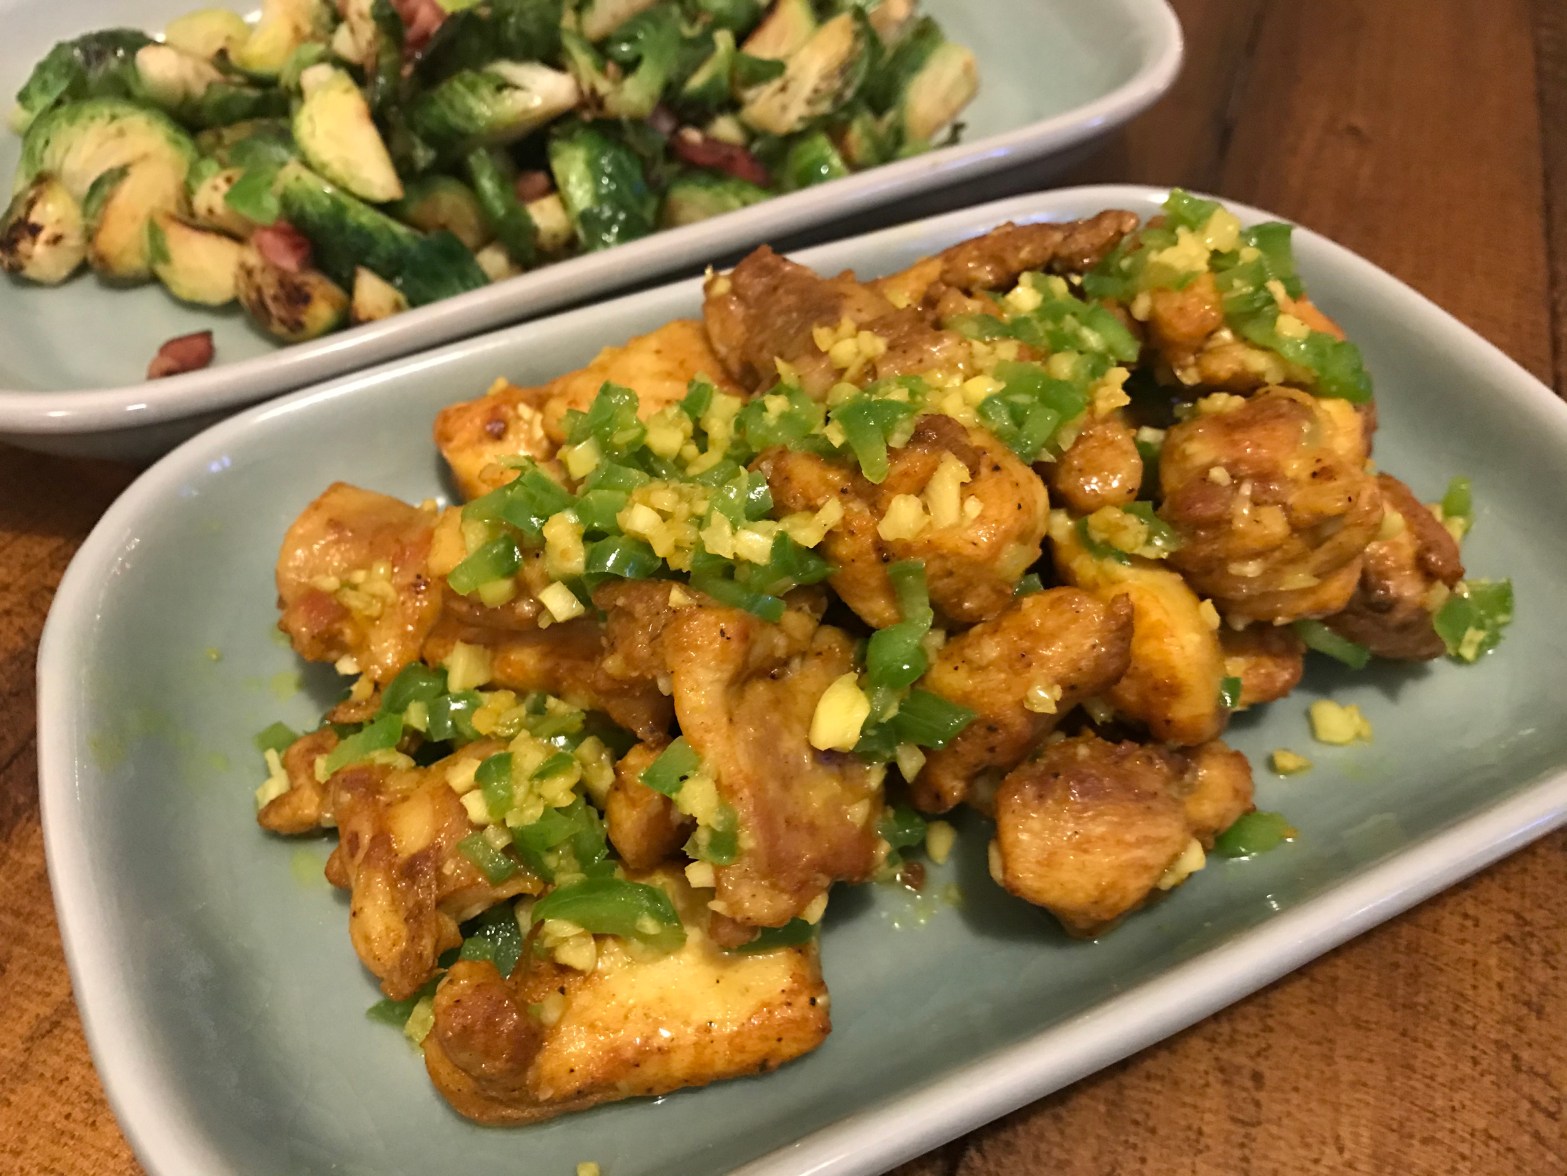
Turmeric is a commonly used spice in Asian food. Thanks to its anti-inflammatory, antimicrobial, and antioxidant properties, turmeric may be an effective treatment for a variety of inflammatory conditions. It’s the most natural kind of anti-inflammatory medicine! Of course, it will take time. You can find turmeric as a supplements in the pharmacy. You can also use it in a lot of dishes. It’s delicious and healthy!
Turmeric is a key spice in curry. Pan fried curry chicken is one of my signature dishes. Most of my friends love this dish. Since I came to the US, I have made a lot of Mexican food which uses turmeric and cumin very often. Thus I turn the curry chicken to turmeric chicken. It’s also very tasty!
❑ 雞腿肉2塊,去皮去骨;Two Chicken Thighs, boneless and skinless
❑ 蒜頭4顆;Four Garlic Cloves
❑ 圓青椒1/4個;1/4 Green Bell Pepper
調味料 SEASONING:
❑ 薑黃粉1茶匙;1tsp Ground Turmeric
❑ 蒜粉半茶匙;1/2 tsp Garlic powder
❑ 小茴香粉半茶匙;1/2 tsp Ground Cumin
❑ 鹽、黑胡椒粉;Salt and Black Pepper
做法 DIRECTIONS:
雞腿切塊,大概1寸乘1寸,如果保留雞皮,切2寸乘2寸,煎的時候不放油,先把雞皮煎香;Cut chicken thigh into 1 inch x 1 inch. If you keep the skin, cut into 2 inch x 2 inch. Pan fry the skin side first without oil
雞腿塊用調味料先調味,醃製至少1小時;Marinate chicken pieces with all seasonings for at least 1 hour
蒜頭、青椒切碎;Finally chop garlic cloves and green pepper
中火燒熱油,加入雞塊,先煎香一面,翻到另外一面,蓋上鍋蓋2分鐘,中小火將雞肉煎熟;Heat up oil in medium heat. Add chicken. Pan fry one side until golden brown and turn to another side. Cook with lid for 2 minutes. Check and pan fry until the chicken is cooked.
加入蒜末和青椒碎,快炒1-2分鐘即可;Add minced garlic and chopped green pepper. Stir fry for 1-2 mins. Serve warm.
About Me
Hi, I’m Joyce. I’m originally from Hong Kong, passionate about food, cooking, and travel. Thanks for visiting! 我是Joyce,來自香港,熱愛美食、烹飪、旅遊,謝謝你瀏覽我的網頁!
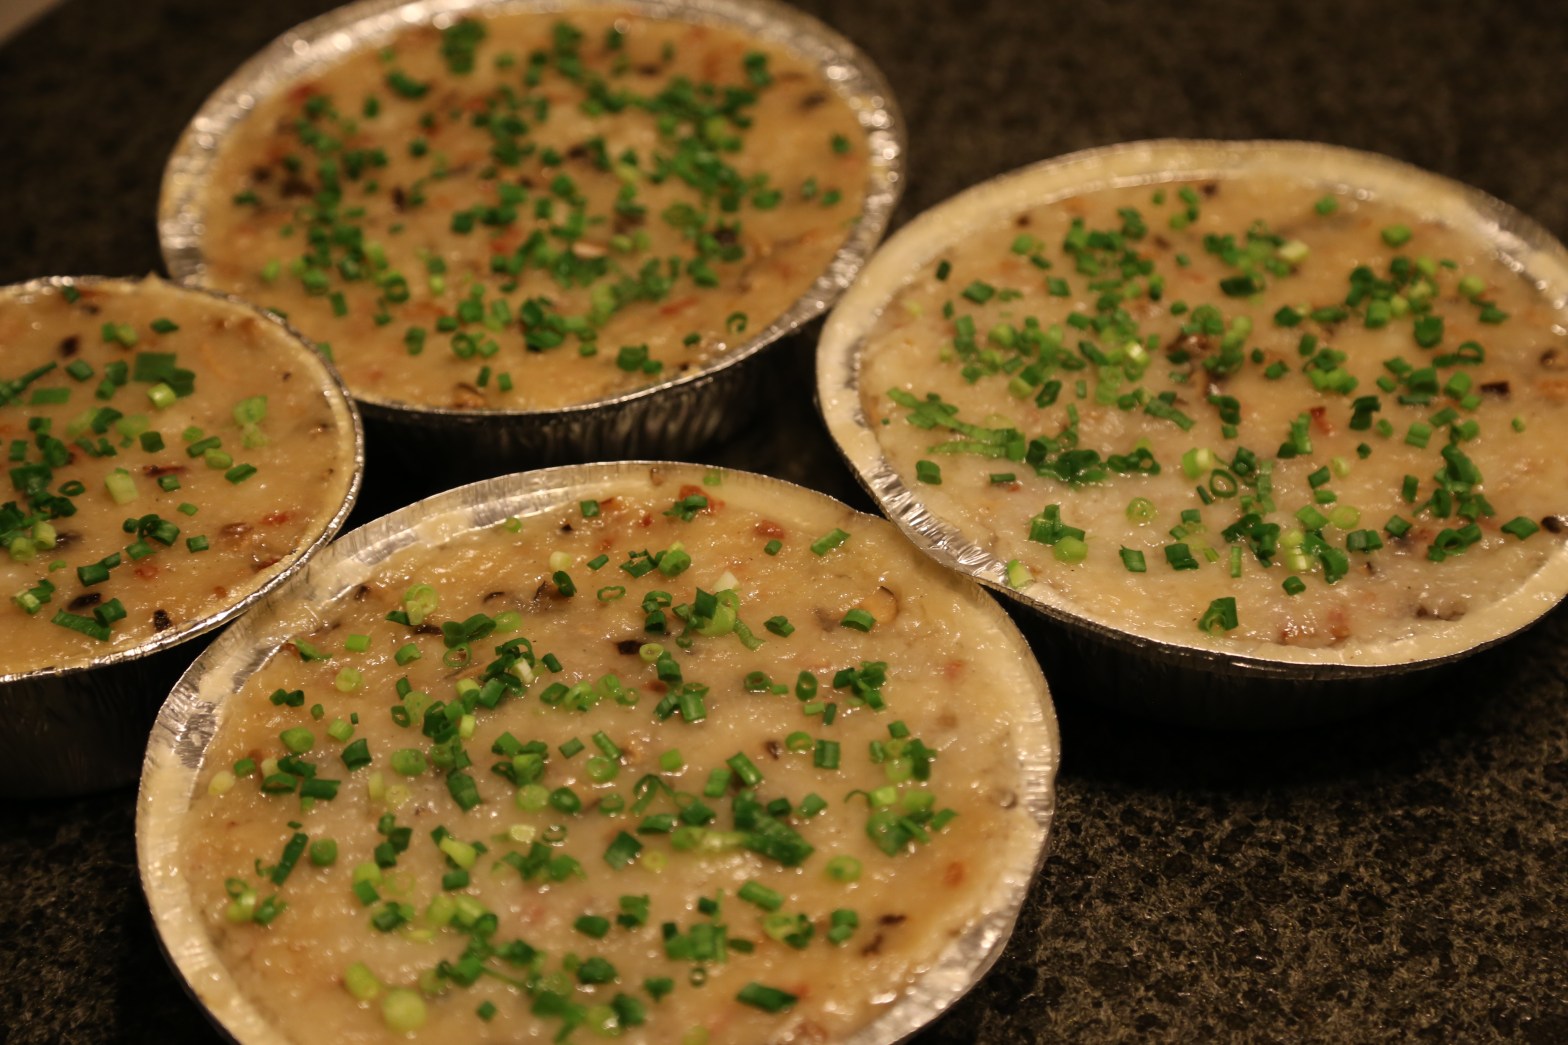
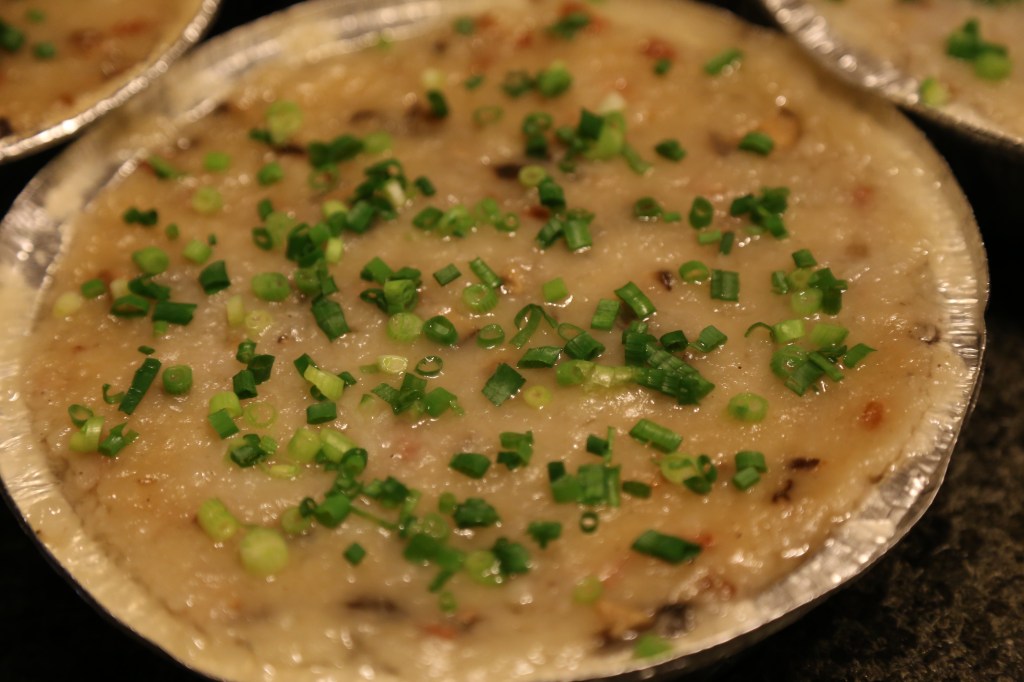
Radish cake – a very popular Hong Kong Dim Sum nowadays. When I was a kid, radish cake was only made and eaten during Chinese New Year (CNY). Cake (Gao in Chinese) has very similar pronunciation as “high” and thus it has a symbolic meaning “progressing up/high”. We used to make radish cake at home before CNY. My mom and my aunt will make quite a lot and so we can serve our relatives radish cake when they came visit us. Sometimes we would even send this as gift. They used the best (and a lot of!) ingredients. The radish cake was so delicious that we never had to buy from store. Later, it is getting popular to have radish cake in restaurants and they created some new recipe e.g. stir fry radish cake with XO sauce. I personally still prefer the more traditional way of eating radish cake.
Although I like radish cake, I don’t make it often except around CNY time. Making radish cake requires a lot of energy. I would get quite tired after making it. Thus, if you have ever tried my radish cake, you are my real friends.
Apart from having a lot of good ingredients, there is also a secret of Mama Lee’s recipe. That is cornstarch in the cake paste. Why? It is because rice flour would give firmness of the cake. Thus, if you only use rice flour, the cake would be too hard. Thus, adding cornstarch would make the cake smooth and softer. Of course, you don’t want to add too much as then the cake will be too soft and thus it’s hard to cut and pan fry it. I normally use a 7:3 (rice flour: cornstarch) ratio.
水的份量也沒有一個絕對標準,第一要看你買到的蘿蔔水份多足,第二也要看你的粘米粉吸水的情況。
Same as the amount of water – it all depends on how juicy the radish is.
總之,如李媽媽常言道「自己執生」。祝大家好運! Like what Mama Lee said, we need to be agile enough in the kitchen to adapt changes. Good luck!
港式蘿蔔糕 HK-Style Radish Cake
份量 Servings
準備時間 Prep Time
烹調時間 Cook Time
難度 Difficulty
3盤*
30 mins
60 mins
★★★★★
*盤8寸直徑,3-4公分深,還有剩下的我用了個大概5寸但較深的盤
以下食譜份量:三盤8寸的糕盤(3-4公分深),還有剩下的我用了個大概5寸但較深的盤。The below recipe is for 3 8-inch cake pan (around 3-4 cm deep) and the remaining can fill up a 5-inch cake pan.
材料 INGREDIENTS:
❑ 蘿蔔 1.8kg;Radish 1.8 kg
❑ 臘腸4條(也可以加臘肉);Chinese sausage 4
❑ 冬菇10個,中型;Dried mushroom, medium size, 10
❑ 蝦米適量;Dried shrimp
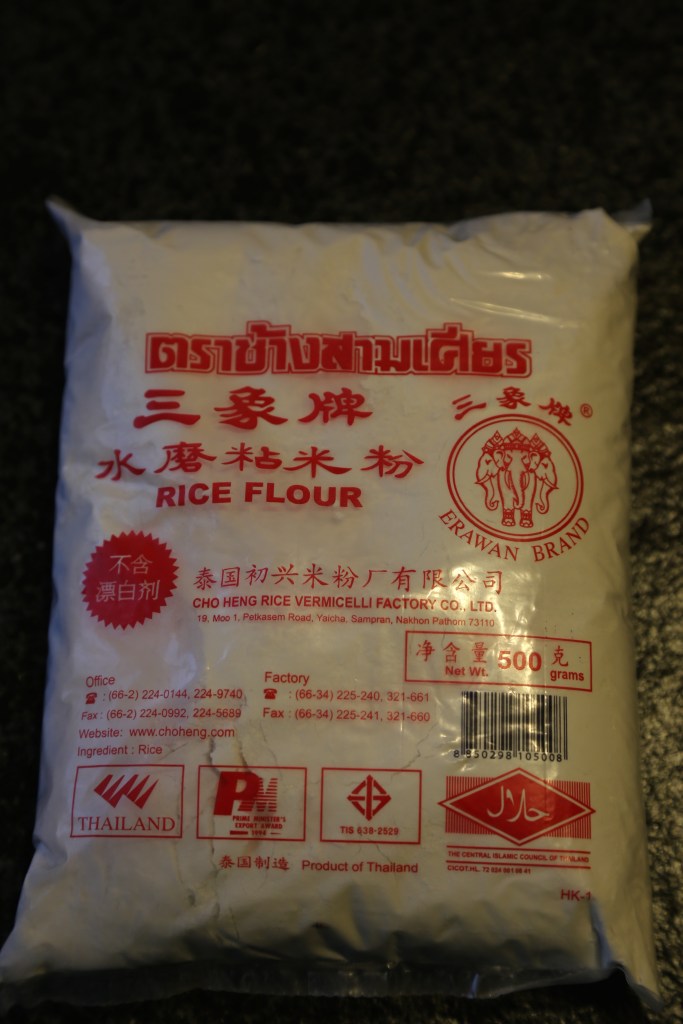
❑ 粘米粉350克;Rice flour 350g
❑ 粟粉150克;Cornstarch 150g
❑ 水大概350-400毫升,請自己根據濃稠情況調整;Water around 350-400ml, adjust if needed
做法 DIRECTIONS:
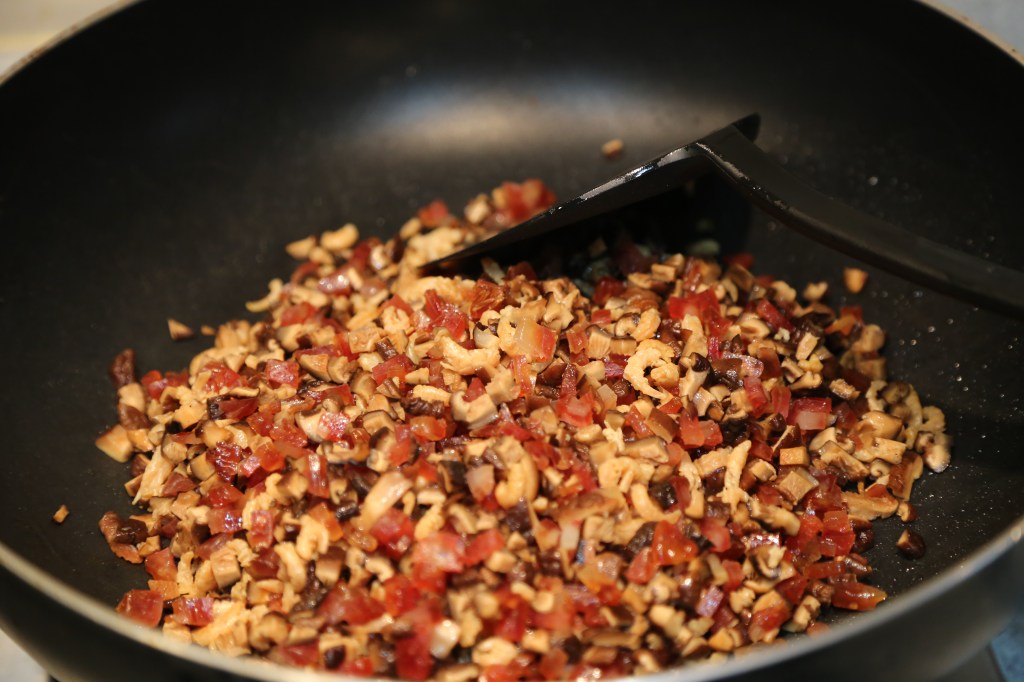
1)用熱水將冬菇和蝦米泡軟,大概需要30分鐘,記得要先將冬菇和蝦米先洗乾淨再泡,這樣泡過冬菇和蝦米的水可以留著在煮蘿蔔的時候用,提升鮮甜味。臘腸、冬菇和蝦米切成小粒。Soak the dried mushroom and shrimp in hot water for at least 30 mins. Wash them before soaking and thus you can use the soaking water later. Cut the sausage, mushroom and shrimp into small dices.
2)將蘿蔔鉋成絲,刨蘿蔔時候出來的水一定要留著 Shred the radish and keep all the juices
3)把粘米粉和粟粉拌勻,加適量的水拌開,能拌開就可以,水不用太多,這個配方的話,我大概用350-400毫升的水。Mix the rice flour and cornstarch and add water. Just enough to mix them well. In this recipe, I use about 350-400ml water.
4)先把鍋燒熱,加少許油,把臘腸、冬菇和蝦米和炒香,把炒香的料盛出來。Heat up the pan. Add a little oil. Add the Chinese sausage, mushroom and shrimp and stir fry for about 3-4 mins until the flavour is coming out. Set aside.
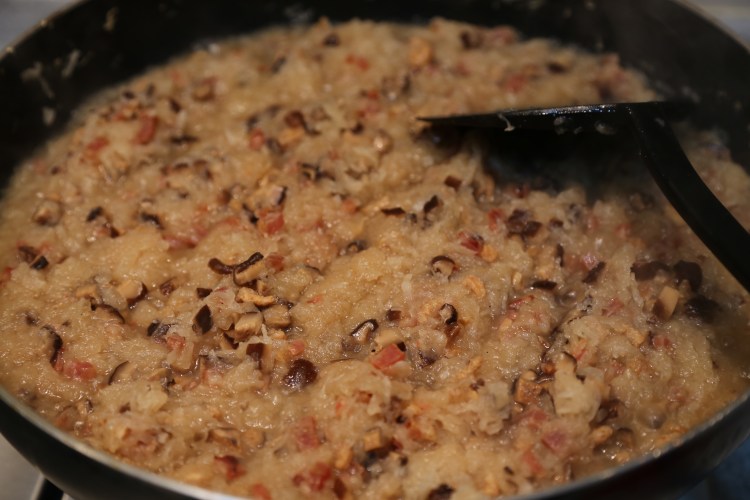
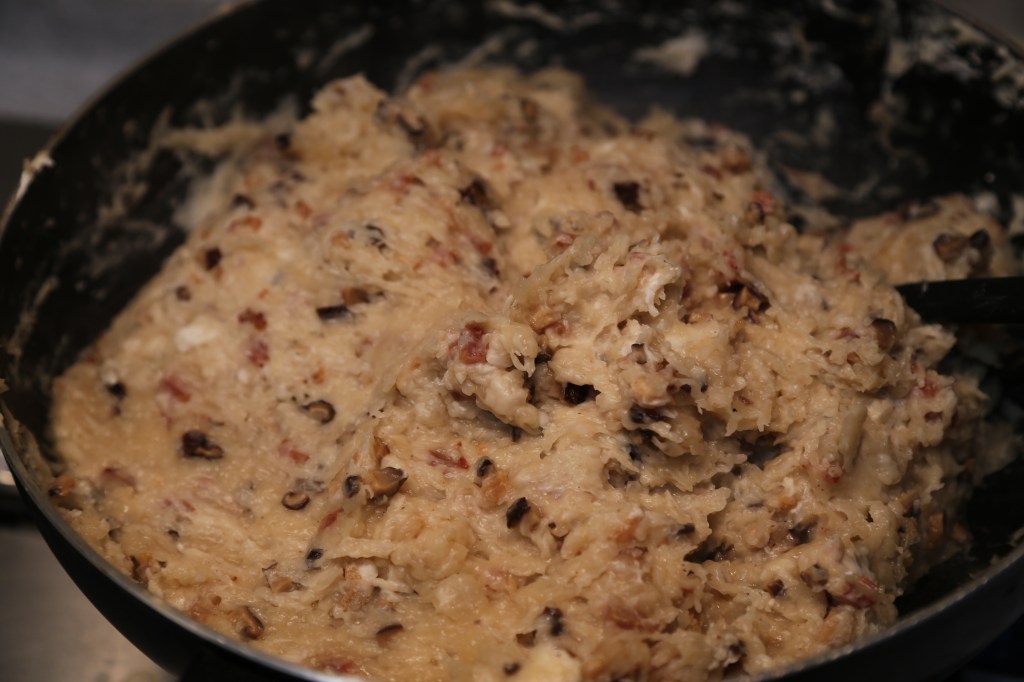
5)把蘿蔔絲連刨蘿蔔的水下鍋煮,加泡過冬菇的水,一定要讓蘿蔔煮一會兒,這樣蘿蔔的甜度才會出來,待蘿蔔煮開,把料加回去拌勻,加鹽、胡椒粉和雞粉調味,再煮開了之後,把火關到最少,再把粉漿一點點的加進去,一邊加,一邊拌勻,要煮成濃稠的漿糊狀才行,這個步驟不能急,要慢,越濃稠越難拌,但不能停,為什麼?誰叫你想吃自家製蘿蔔糕?而且做人不能半途而廢!In the same pan, add the shredded radish including the radish juice. Add the soaking water of mushroom. Cook the radish until it’s tender. Add back the cooked sausage, mushroom and shrimp. Season with salt, pepper and some chicken bouillon powder. Turn the heat to the lowest. Add the flour paste gradually and keep stirring it unit the radish cake paste is formed.
6)錫紙盤底塗抹一點油,把煮要的蘿蔔粉漿,放進錫紙盤裡,可以用一些油把表面弄平。Brush some oil in a cake pan. Pour the radish cake paste. Use some oil on the spatula to smooth out the cake surface.
7)中火蒸大概45分鐘,用牙籤插進去不粘牙籤就算熟了,熟了之後,撒上蔥花,再蒸一分鐘。Steam in medium heat for about 45 minutes. Check with a tooth pick. Top with some chopped green onion and steam for another minute.
重要提醒 Important Reminders:
蘿蔔糕要待半天左右才會變硬,一般會切片煎,再粘辣椒漿吃。The cake is very soft when it’s freshly steamed. Need to wait for about half day before you can cut into slices and pan fry.
粘米粉我用的下面的這個牌子,在香港應該很容易買到,在國外一般中國或亞洲超市都會有。I use the below brand for the rice flour. Should be quite widely available in Asian supermarket.
我認識一些朋友喜歡加瑤柱(即干貝),我個人不太喜歡,你自己喜歡放什麼都可以!I know some people like to put some dried scallop. Yet, I don’t like it much. So it’s up to you if you want to put some.
如果想做XO醬炒蘿蔔糕,將蘿蔔糕切塊後,要先煎香才炒,蘿蔔糕建議多一點粘米粉,蘿蔔糕太軟不容易炒。If you want to stir fry the radish cake with XO sauce, then you better increase the proportion of rice flour in the recipe and so the cake is firmer and it would be easier to stir fry.
About Me
Hi, I’m Joyce. I’m originally from Hong Kong, passionate about food, cooking, and travel. Thanks for visiting! 我是Joyce,來自香港,熱愛美食、烹飪、旅遊,謝謝你瀏覽我的網頁!
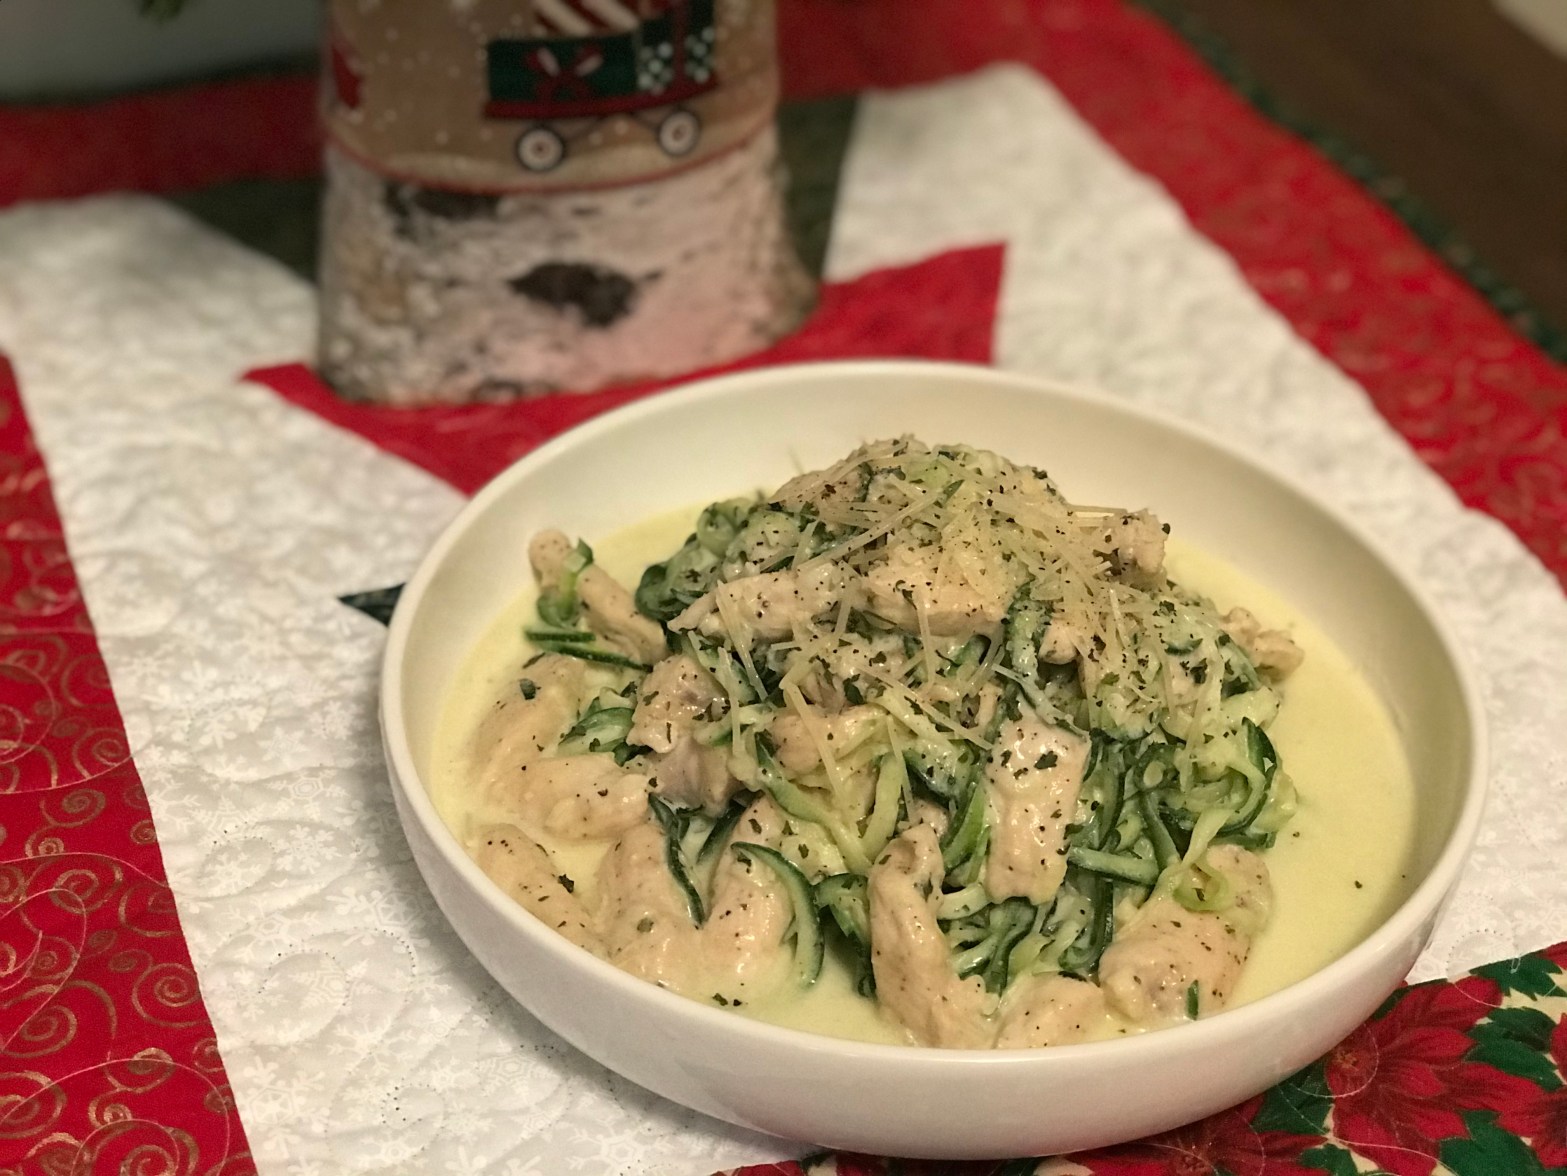
Good news for all those who are on diet! Zucchini noodles (or Zoodles!) This is another good option for you other than cauliflower rice or cauliflower pizza. You would need a veggie spirializer. It’s easy to get online. Since it’s “fake noodles”, I’ve made a white sauce. If you still are worried about calories, you can just season with some salt, black pepper and garlic powder. Don’t be too tough on yourself, please!
❑ 鹽、黑胡椒粉、蒜粉、乾香芹;Salt, black pepper, garlic powder, dried parsley
做法 DIRECTIONS:
雞胸肉切條;Cut chicken breast into 2 inch slices
節瓜削成絲;Shred zucchini into slices using a veggie spirializer
中火燒熱油,先把節瓜面略炒1-2分鐘,不要煮太軟;Heat olive oil in medium heat. Stir fry zucchini noodles for 1-2 mins until it’s slightly soften
再燒熱少許油,加雞胸肉,鹽、黑胡椒粉調味,中火炒熟;Heat up slightly more oil. Add chicken breast. Season with salt and black pepper and stir fry until chicken is cooked
加入淡奶油,鹽、黑胡椒粉、蒜粉調味,中火煮至略濃稠;Add heavy cream. Season with salt, black pepper and garlic powder. Cook in medium heat until it’s slightly thicken
加入芝士和乾香芹,中火煮至濃稠;Add cheese and dried parsley. Cook in medium heat until it’s thicken
節瓜面回鍋,記得千萬不要放入節瓜面出的水,關火,拌勻即可;Add back the zucchini noodles (remember don’t add the water coming out from the veggie). Turn off heat and mix well. Serve warm.
About Me
Hi, I’m Joyce. I’m originally from Hong Kong, passionate about food, cooking, and travel. Thanks for visiting! 我是Joyce,來自香港,熱愛美食、烹飪、旅遊,謝謝你瀏覽我的網頁!
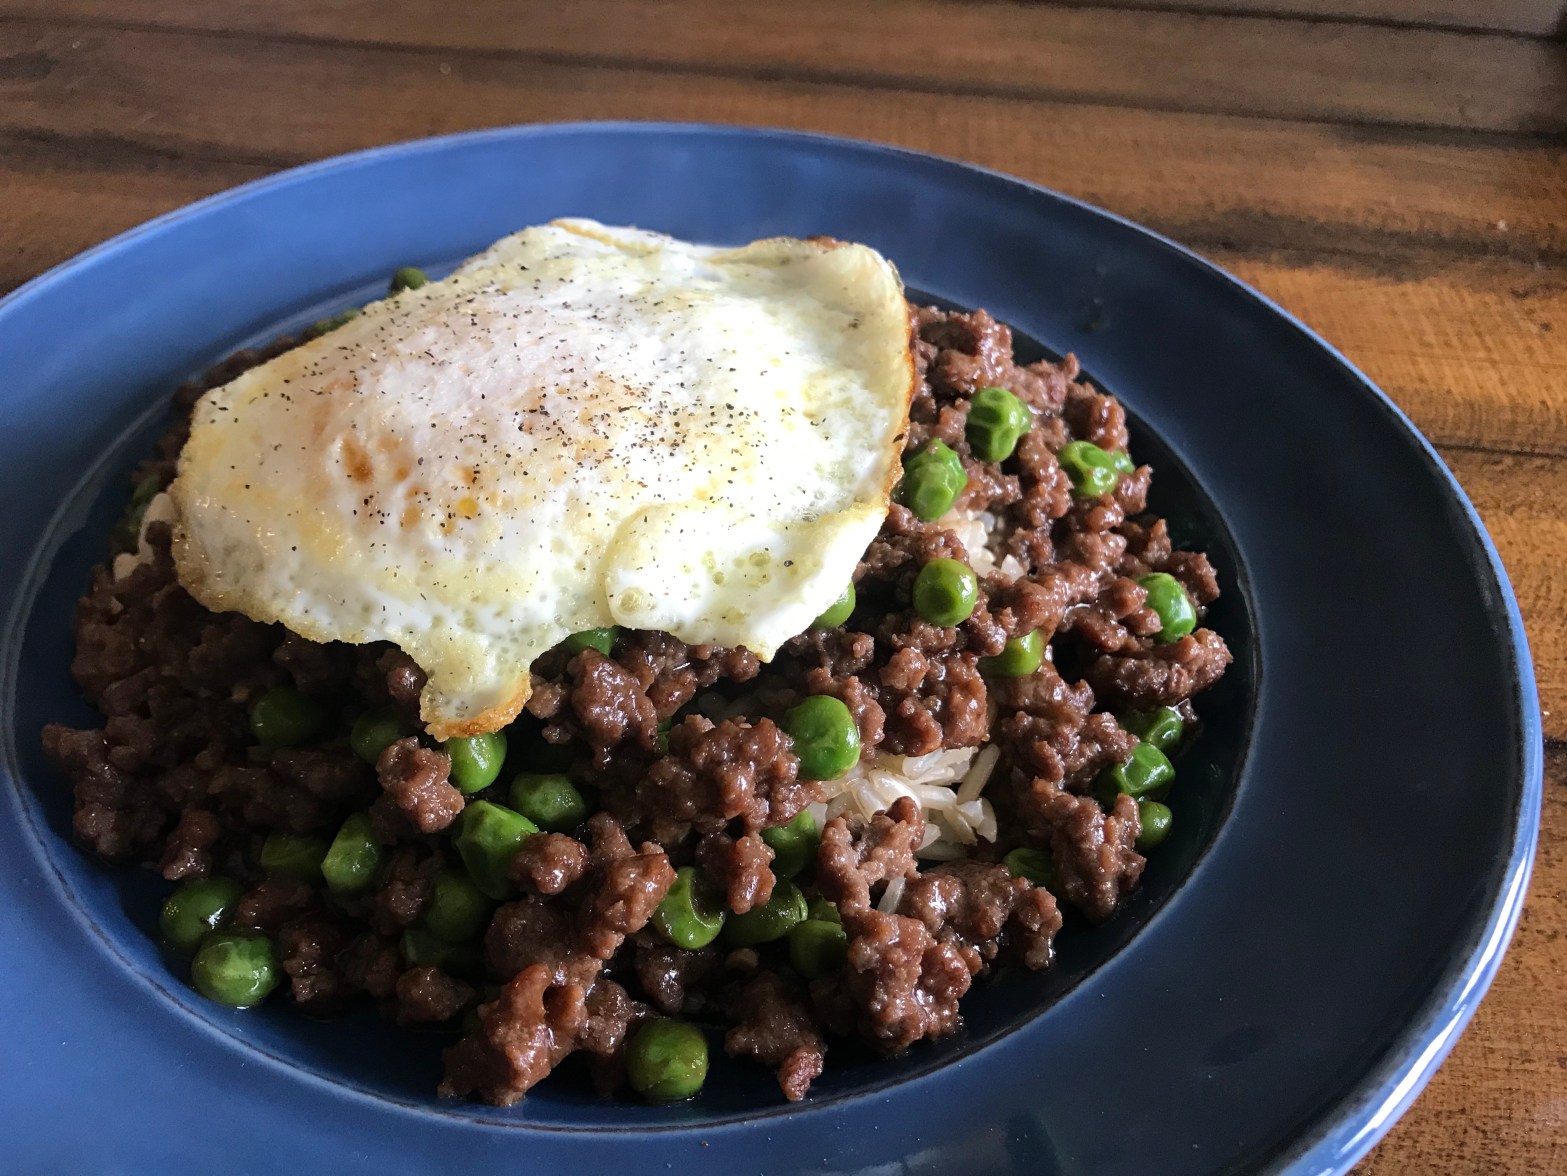
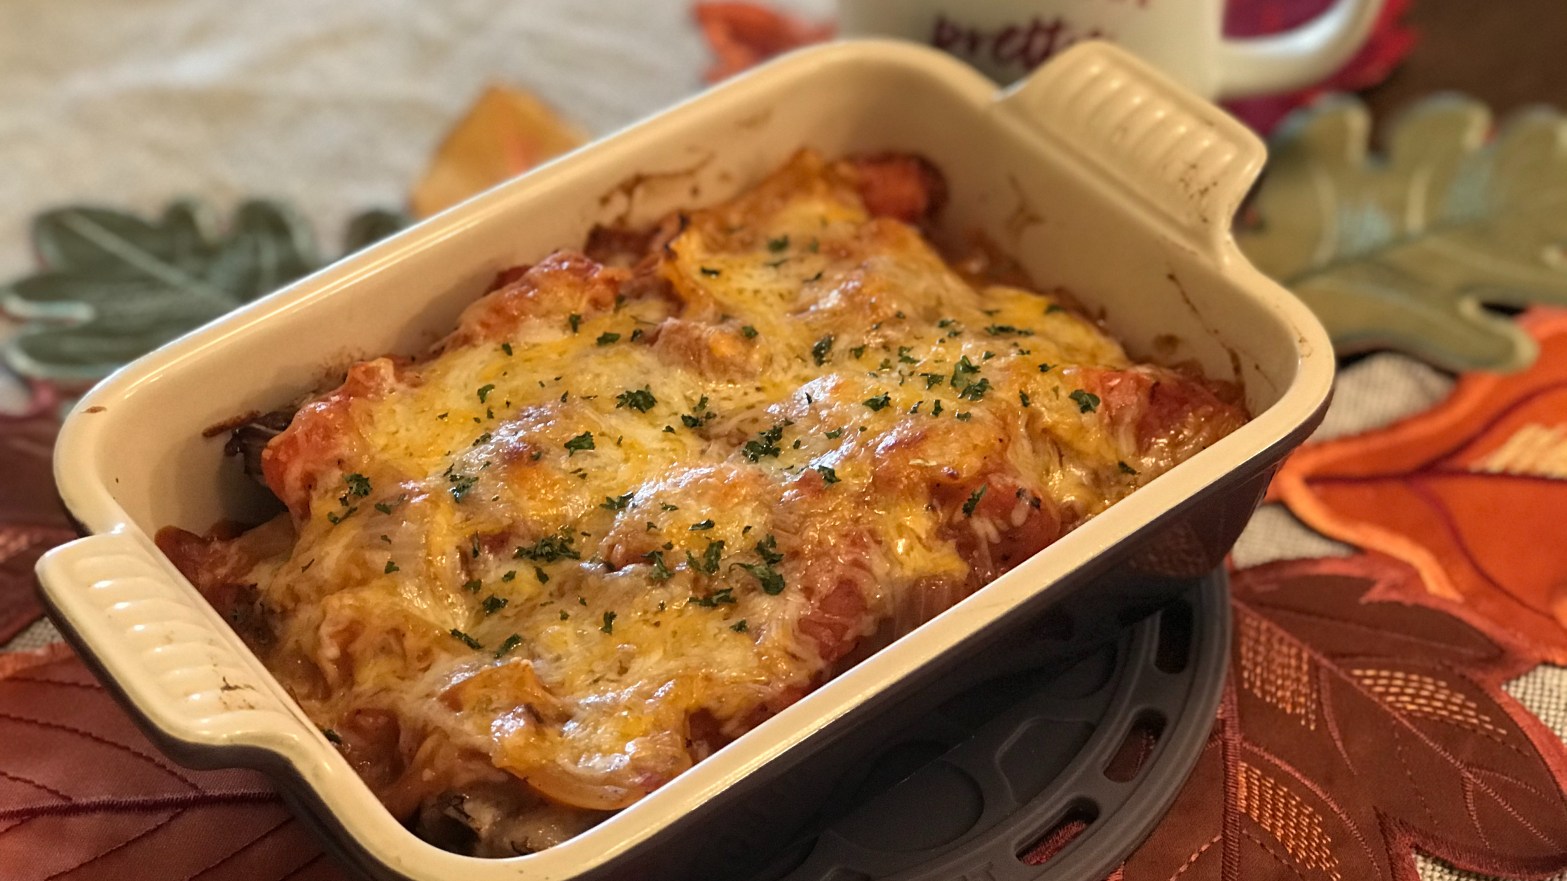
Baked Pork Chop with Rice is one of the classic “Soy Sauce Western Food” in Hong Kong. No Hongkonger doesn’t like it. You can make it at home too! Ms HK is sharing the recipe (even without oven) in this video.
焗豬扒飯 Baked Pork Chop with Rice
份量 Servings
準備時間 Prep Time
烹調時間 Cook Time
難度 Difficulty
1
10 mins
30 mins
★★★
材料 INGREDIENTS:
❑ 豬扒一塊;1 Pork Chop
❑ 白飯一碗;1 bowl of rice
❑ 雞蛋一隻;1 Egg
❑ 青豆1/3碗;1/3 bowl of pea
❑ 番茄一個;1 Tomato
❑ 洋蔥半個:Half Onion
❑ 蒜蓉一湯匙;
❑ 雞湯1杯;1 cup of Chicken Broth
❑ 麵粉一湯匙;1 tbsp of Flour
❑ 番茄膏一湯匙;1 tbsp of Tomato Paste
❑ 芝士適量;Cheese
❑ 鹽、胡椒粉、醬油、糖、黑胡椒、蒜粉各適量;Salt, white pepper powder, soy sauce, sugar, black pepper, garlic powder for seasoning
做法 DIRECTIONS:
洋蔥番茄切塊備用;Cut onion and tomato into pieces. Set aside
烤箱425F預熱;Preheat oven at 425F
中火燒熱鍋,放少許油,炒雞蛋,盛起備用;Heat up some oil in medium heat and stir fry some scramble egg. Set aside.
再燒熱少許油,放米飯,炒熱後,放鹽和胡椒粉調味;Heat up some oil. Add rice and stir fry. Season with salt and pepper.
加入雞蛋和青豆,繼續炒,放少許醬油,盛起備用;Add egg, peas and continue to stir fry. Season with soy sauce. Set aside.
燒熱油,中火,放豬扒,兩面煎香;盛起備用;Heat up some oil. Medium heat. Pan fry pork chop until golden brown. Set aside.
燒熱油,中火,炒香洋蔥,加入蒜末;Heat up some oil. Medium heat. Add onion and stir fry and then add minced garlic.