西式櫛瓜餡餅 Zucchini Fritters

要做出好吃健康的素食不難,如果想完全零澱粉,可以用杏仁麵粉代替。這個櫛瓜餡餅Zucchini Fritters健康易做又好吃,改用美洲南瓜(yellow squash)或者胡蘿蔔都可以。

This vegetarian recipe is simple, healthy and delicious.  If you want it to be totally carbs free, you can replace with almond flour.  You can also replace zucchini with yellow squash or carrot.

一直不知道zucchini的中文,上網搜查了一下台灣叫櫛瓜,香港也有這種瓜但一般在西式超市才找到,但應該跟翠玉瓜同科(但顏色有點不同),所以香港的朋友也可以用翠玉瓜代替啊。

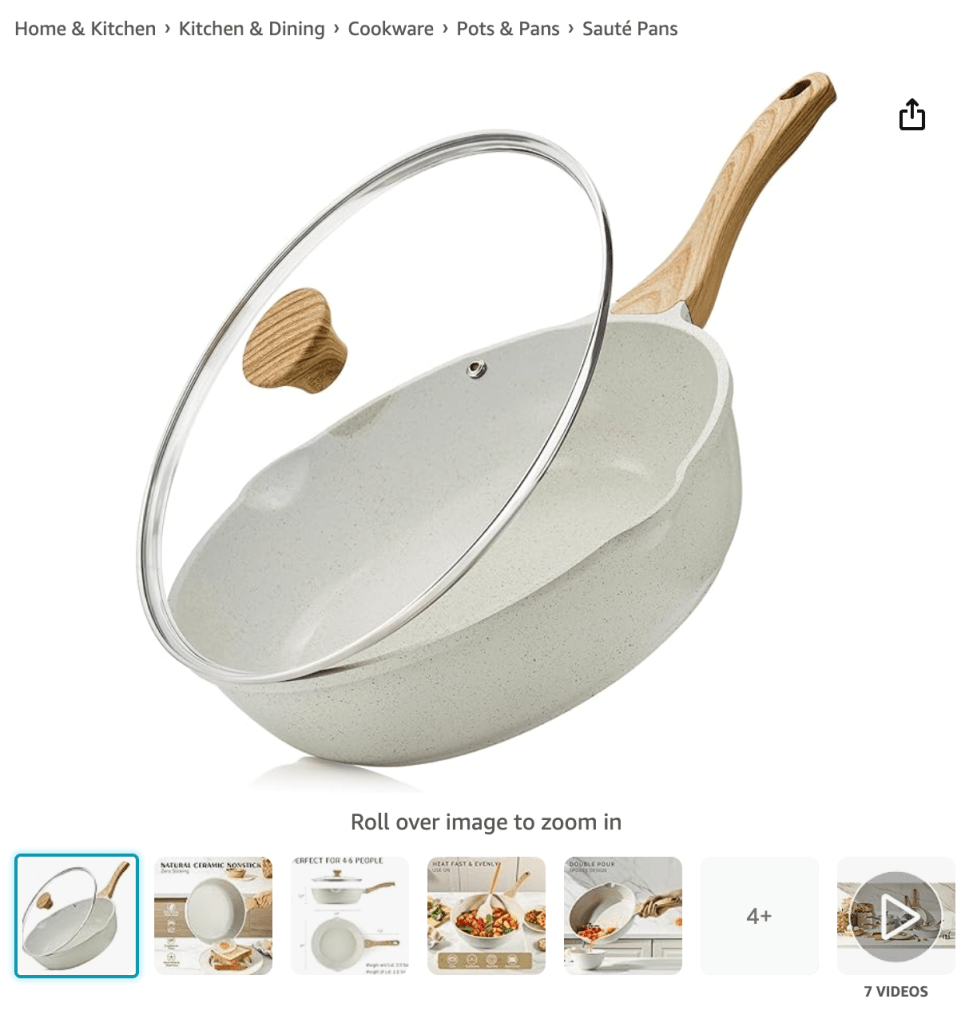
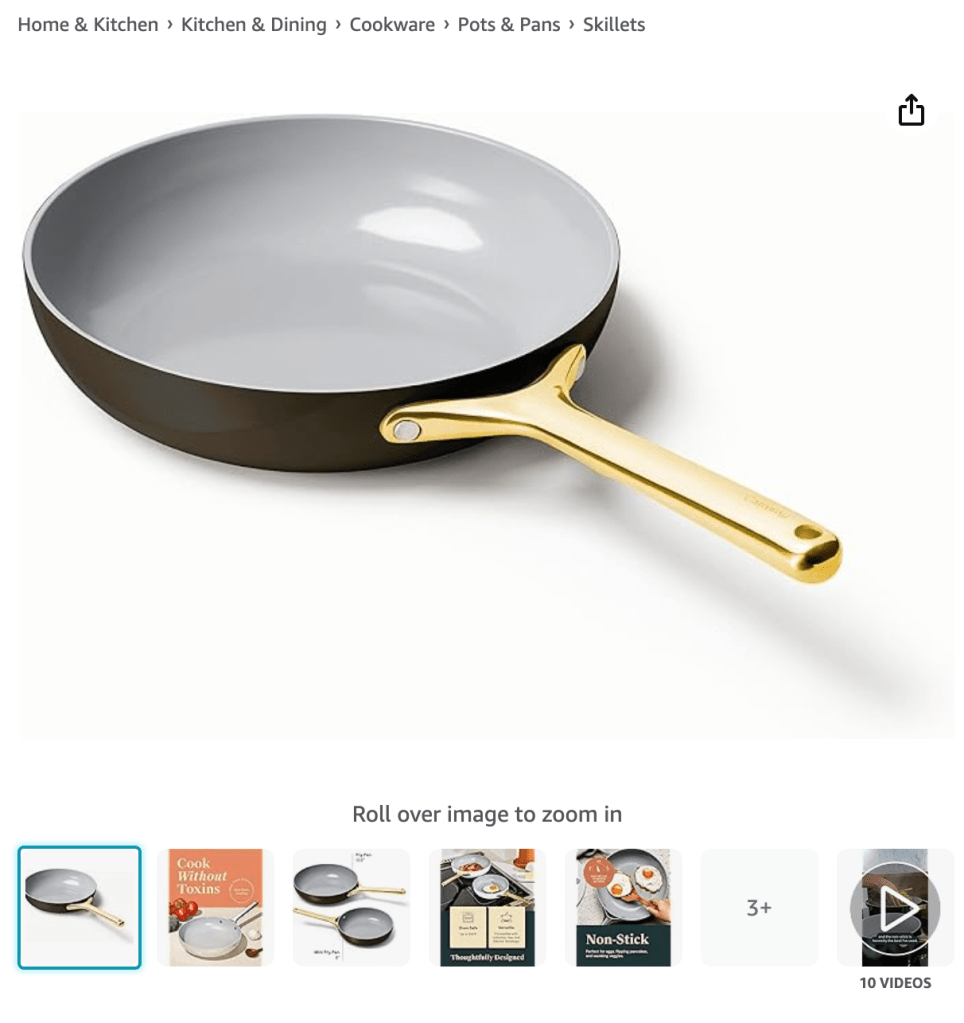
以下是我做這道菜時常用的廚具,透過連結購買,我會獲得少許佣金,你不用多付一分錢。As an Amazon Associate I earn from qualifying purchases. The links below are paid links: if you buy through them, I may earn a small commission at no extra cost to you.

不沾鍋 Non-stick pan: 煎餅,不容易黏鍋,洗起來也方便。Good for pan frying the fritters without sticking, and easy to clean.

西式櫛瓜餡餅 Zucchini Fritters


份量
Servings

準備時間
Prep Time

烹調時間
Cook Time

難度
Difficulty
7-8 件 pcs20 mins20 mins★★

材料 INGREDIENTS:

❑ 材料1;節瓜1條 One zucchini

❑ 材料1;雞蛋一隻 One egg

❑ 材料1;麵粉,鹽,胡椒粉和芝士粉 Flour, salt, pepper and parmesan cheese


做法 DIRECTIONS:

  1. 先把櫛瓜刨成絲 Grate the zucchini 
  2. 放鹽,靜置15分鐘 Add salt and rest for 15 mins
  3. 把櫛瓜擠乾水 Squeeze all the water out
  4. 加入雞蛋、麵粉、鹽、胡椒粉和芝士 Add egg, flour, salt, pepper and cheese
  5. 攪拌均勻 Mix them well
  6. 中火燒熱油 Heat up some oil in medium heat
  7. 用湯匙加入櫛瓜餡料 Add the zucchini batter with a spoon
  8. 慢慢煎至一面金黃色 Pan fry one side until golden brown
  9. 翻到另一面,繼續中火慢慢煎至金黃色 Turn to the other side to continue to pan fry until golden brown
About Me

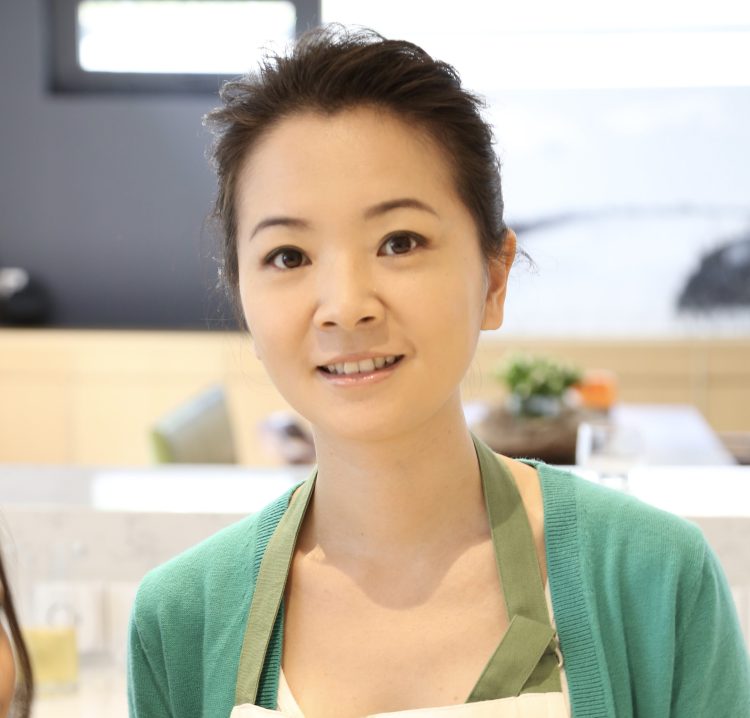
Hi, I’m Joyce. I’m originally from Hong Kong, passionate about food, cooking, and travel. Thanks for visiting! 我是Joyce,來自香港,熱愛美食、烹飪、旅遊,謝謝你瀏覽我的網頁!
Subscribe to My Blog 訂閱我的博客

As an Amazon Associate, I earn commission from qualifying purchases.

COPYRIGHT@2020-2026 港姐廚房人生 Ms HK’s Kitchen

薑蔥油煎雞排 Chicken with Ginger and Scallion Sauce

這個食譜的靈感來自於吃香港燒味中我最愛的薑蔥蓉和蔥油雞,用雞排是為了方便不愛吃帶骨頭的雞肉的西人,有點中菜西吃的感覺。

This recipe is developed based on my favourite sauce usually people would be given when they order HK style BBQ and another green onion chicken dish.  Use boneless chicken thigh instead of whole chicken as Mr Large doesn’t like chicken with bones.

以下是我做這道菜時常用的廚具,透過連結購買,我會獲得少許佣金,你不用多付一分錢。As an Amazon Associate I earn from qualifying purchases. The links below are paid links: if you buy through them, I may earn a small commission at no extra cost to you.

不沾鍋 Non-stick pan: 煎雞排,不容易黏鍋,洗起來也方便。Good for pan-frying the chicken thigh without sticking, and easy to clean.

薑蔥油煎雞排 Chicken with Ginger and Scallion Sauce


份量
Servings

準備時間
Prep Time

烹調時間
Cook Time

難度
Difficulty
210 mins15 mins★

材料 INGREDIENTS:

❑ 去皮去骨雞腿肉 Skinned and boneless Chicken thighs

❑ 薑 Ginger

❑ 蔥 Scallions


做法 DIRECTIONS:

  1. 先燒熱少許橄欖油,放雞排,中火先把一面煎香 Heat up some olive oil.  Pan fry the chicken thighs until one side is golden brown
  2. 煎至金黃色後,翻倒令我一面繼續煎 When one side is golden brown, turn to the other side.  Turn to medium low heat.  Cover with lid and continue cooking
  3. 把雞腿煎熟後,先盛起備用 When chicken is cooked, set aside
  4. 煎鍋放橄欖油,加入薑末先炒香 Put some olive oil and stir fry the minced ginger
  5. 再加入蔥粒,炒香 Add the scallions and continue to stir fry
  6. 關火,加入兩湯匙醬油、少許胡椒粉和糖調味 Turn off the heat.  Season the sauce with 2 tbsp soy sauce and some pepper and sugar
  7. 把薑蔥油淋在雞腿上即可 Pour the ginger and scallion sauce on the chicken thighs.  Serve warm.
About Me

Hi, I’m Joyce. I’m originally from Hong Kong, passionate about food, cooking, and travel. Thanks for visiting! 我是Joyce,來自香港,熱愛美食、烹飪、旅遊,謝謝你瀏覽我的網頁!
Subscribe to My Blog 訂閱我的博客

As an Amazon Associate, I earn commission from qualifying purchases.

COPYRIGHT@2020-2026 港姐廚房人生 Ms HK’s Kitchen

台灣鹽水雞 Taiwanese Salty Chicken

天氣越來越熱,涼拌的料理最合適了,也可以備好在冰箱,隨時就可以拿出來吃了!

台灣小吃我最愛,鹽水雞簡單易做也健康!

Taiwanese night market snack food is my all time favorite.  This chicken is easy to make and healthy.

台灣鹽水雞 Taiwanese Salty Chicken


份量 Servings

準備時間Prep Time

烹調時間Cook Time

難易程度Difficulty
220 mins20 mins★★

材料 INGREDIENTS:

❑ 去皮去骨雞腿肉兩塊;2 pcs Skinless and boneless chicken thigh

❑ 西蘭花,玉米筍(或你自己喜歡的蔬菜);Broccoli, Baby corns (or any kind of vegetables that you like)


做法 DIRECTIONS:

  1. 雞腿先用一湯匙鹽、一湯匙五香粉、少許胡椒粉、麻油和米酒先醃製一晚 Marinate the chicken thighs with 1 tbsp salt, 1 tbsp five spices, a little of pepper, sesame oil and rice wine over night
  2. 燒開水,加少許鹽和麻油,蔬菜先燙熟 Boil some water.  Add some salt and sesame oil.  Add vegetables.  Wait till the water is boiled.  Cook for 1-2 mins. 
  3. 燙熟的蔬菜放入冰水 Put the cooked vegetables in ice water
  4. 再燒開一鍋水,加薑、蔥、洋蔥、鹽,加入雞腿肉, Boil another pot of water.  Add ginger, scallion, onion and some salt.  Add chicken thighs. 
  5. 等水再燒開,煮5分鐘,蓋上鍋蓋,關火燜5分鐘 Wait until the water is boiled again.  Cook for 5 minutes.  Cover the pot with the lid and turn off the heat.  Keep the lid on the pot for 5 mins.
  6. 備一碗鹽水,鹹度要比一般能接受的鹹度鹹一點, Prepare a salt water (slightly saltier than normal). 
  7. 把煮熟的雞腿肉放進鹽水泡15分鐘 Put the cooked chicken and soak for 15 mins
  8. 雞腿肉剪大塊,加入蔬菜,加入少許煮雞腿的雞湯,拌勻,試一下味,不夠鹹可以加鹽胡椒調味 Cut the chicken thighs into pieces and mix with the vegetables and chicken soup.  Season with more salt and pepper if needed.
About Me

Hi, I’m Joyce. I’m originally from Hong Kong, passionate about food, cooking, and travel. Thanks for visiting! 我是Joyce,來自香港,熱愛美食、烹飪、旅遊,謝謝你瀏覽我的網頁!
Subscribe to My Blog 訂閱我的博客

As an Amazon Associate, I earn commission from qualifying purchases.

COPYRIGHT@2020-2026 港姐廚房人生 Ms HK’s Kitchen

印度花椰菜咖哩 Gobi Masala

Cauliflower has become one of my favourite type of veggie.  This Indian vegan recipe is absolutely delicious.  Healthy and yummy!

花椰菜成為了我最愛的蔬菜後,現在是我飯桌上的常客!這個印度素食料理絕對會驚艷你的味蕾,健康又美味!

I love using spices in my dishes especially turmeric! Turmeric has very good health benefits. It’s a kind of natural inflammatory medicines. Add a little of black pepper will help bring out the benefits more. Have been making a few Indian dishes at home. This vegan dish is absolutely delicious and healthy. I tried to cook cauliflower in instant pot but found it too difficult to get the crunchy cauliflower I like. This has to be cooked on stove top. Don’t over cook it. Make sure it’s cooked and slightly soften but still crunchy!

我非常愛用天然香料做料理,最近尤其愛上了薑黃,有很好的食療作用,是一種天然的抗炎藥,加上一點黑胡椒更能發揮薑黃的功效。在家有幾個常做的印度菜,這個素食絕對是既健康又美味,我試過幾次用instant pot做花椰菜都沒法煮出我喜歡的脆度,因此我還是建議這個花椰菜必須在一般的爐頭上煮,千萬要注意不要煮過熟,煮到剛熟有點軟但還維持一定脆度才是最好吃的花椰菜啊!

印度花椰菜咖哩 Gobi Masala


份量
Servings

準備時間
Prep Time

烹調時間
Cook Time

難度
Difficulty
220 mins20 mins★★★★

材料 INGREDIENTS:

❑ 花椰菜半個;Half head of cauliflower

❑ 蕃茄一個;1 tomato

❑ 洋蔥一個;1 onion

❑ 蒜蓉一湯匙;1 tbsp of minced garlic

❑ 薑蓉一湯匙;1 tbsp of minced ginger

❑ 芫荽少許;A few cilantro

調味料 SEASONINGS:

❑ 薑黃1/4茶匙;1/4 tsp turmeric

❑ 孜然 1/2茶匙;1/2 tsp cumin

❑ 辣椒粉1茶匙;1 tsp chili powder

❑ 鹽1/2茶匙;1/2 tsp salt

❑ 肉桂粉1/2茶匙;1/2 tsp cinnamon


做法 DIRECTIONS:

  1. Cut tomato into slices 蕃茄切小塊
  2. Cut onion into slices along the grain 洋蔥順紋切粗絲
  3. Finally chop ginger and garlic 把薑和蒜分別切碎
  4. Heat up 1 tbsp olive oil in a saute pan 炒鍋燒熱橄欖油
  5. Add onion and stir fry in medium to low heat until slightly soften and golden 中小火先把洋蔥炒軟和微黃
  6. Add tomato and stir fry until soften 加入蕃茄炒軟
  7. Add minced ginger and garlic and stir well 加入薑蓉和蒜蓉炒勻
  8. Add all seasonings and stir well 加入所有的調味料並炒勻
  9. Add cauliflower and stir well 加入花椰菜炒勻
  10. Add 1/2 cup water. Cover the lid and cook for about 5-10 mins 加入半杯水,蓋上鍋蓋煮大概5-10分鐘
  11. Cook until water is evaporated and cauliflower is softened. 煮至水收乾及花椰菜變軟
  12. Add some chopped cilantro and stir well. Serve warm. 加入芫荽碎炒勻即可。
About Me

Hi, I’m Joyce. I’m originally from Hong Kong, passionate about food, cooking, and travel. Thanks for visiting! 我是Joyce,來自香港,熱愛美食、烹飪、旅遊,謝謝你瀏覽我的網頁!

Subscribe to My Blog 訂閱我的博客

As an Amazon Associate, I earn commission from qualifying purchases.

COPYRIGHT@2020-2026 港姐廚房人生 Ms HK’s Kitchen

花生醬曲奇 Peanut Butter Cookies

終於!終於!我挑戰曲奇成功了,可以說是大成功,西人一看到第一句是說“wow,看來你做對了”,吃完第一口說“hmmm….可以,就是這個味道了!”,看到他的反應,我就只輕輕的說了一句“你看,我是會做甜點的,不要再叫我放棄做曲奇了!”,這種征服的感覺特別爽!

Finally!  Finally!  I successfully challenged cookies.  I would call it a “big success” this time.  When Mr Large just first looked at the cookies, he said “Wow!  You made it this time!”.  After he tried the first bite, he further said “hmmmm….quite good.  This is what peanut butter cookies should taste like”.  This is the kind of sense of achievement I am always looking for when I take on a challenge.  You have overcome something that you were told to give up or no one believed (even yourself) that you would be able to make it!

老實說,在被要求放棄後,我沒有真的放棄,我有繼續研究不同的食譜、不同甜點專家的分享,同時也給自己配備了一個廚房稱,因為其中一個我參考的甜點達人有分享,有時候曲奇做出來像蛋糕是因為沒量準麵粉的份量,尤其是如果用量杯,特別容易量多了,這也是為什麼我等了兩週再嘗試曲奇,因為我想等到我的廚房稱再嘗試,果然,這次做出來的不像之前那樣,總像蛋糕那樣,這次做出來外面有點酥脆,但內面是軟的,這也是西人口中曲奇該有的質感。

Honestly speaking, since I was told to give up on cookies, I have not really given up.  I have research and studied different recipes and the experiences shared by other people.  Besides, as I shared last time, accurate measurement of ingredients is particularly important when making dessert.  I have got myself a kitchen scale finally.  One of the dessert guru shared that sometimes the cookies tase too “cakery” is because we have put too much flour using measurement cup to measure.  It is totally worth it to wait for 2 weeks for the kitchen scale.  Having a more precise and accurate measurement, the texture of the cookies I made this time is totally different.  It’s the more crunchy outside but soft and chewy inside type!

傳統的花生醬曲奇會在外面裹一層白糖才烤,而且必須要用叉子在上面壓兩下弄個造型。除此之外,另外一個學習到做曲奇的技巧是,要把混合好的材料先放冰箱30分鐘,這樣可以讓你更容易揉成圓形才烤,做出來的曲奇的形狀更美更一致。這邊簡單的分享一下這個食譜,我基本跟著食譜去做,但減少了白糖的份量,也已經很夠甜了!說到糖,也分享一下學到關於使用黃糖和白糖在甜點的區別,用黃糖的話,甜點的質感會更濕潤,白糖就比較乾,所以我覺得做曲奇比較適合用黃糖。

Traditional peanut butter cookies have two special features – 1) wrap the cookies with some white sugar before baking; 2) use a fork to make a fork mark on the cookies.  Apart from this, another key skill I learn about making cookies is to put the cookie dough in the fridge for about 30 mins before baking.  This will help you to form a round shape cookies more easily and to ensure similar sizes of your cookies.  Here to share the recipe that I used.  I have followed mostly the recipe except that I have cut down the white sugar used.  It’s still very much sweet enough.  Talking about sugar, another learning I have from my research is the difference between brown sugar and white sugar in making dessert.  Brown sugar will give more moist in your dessert and thus I think it’s a better option for cookies.

花生醬曲奇 Peanut Butter Cookies


份量
Servings

準備時間
Prep Time

烹調時間
Cook Time

難度
Difficulty
17-20塊pcs30 mins10 mins★★★

材料 INGREDIENTS:

黃油 Butter140g
花生醬 Peanut Butter140g
黃糖 Brown Sugar135g
白糖 White Sugar 25g(或者不放 Or skip it at all)
雞蛋 Egg 1
香草精 Vanilla Extract 1/2 tsp
麵粉 All Purpose Flour 185g
玉米澱粉 Cornstarch 1 tbsp
蘇打粉 Baking Soda 3/4 tsp
鹽 Salt 3/4 tsp

做法 DIRECTIONS:

  1. 先把放至室溫的黃油和花生醬、黃糖、白糖混合好 Combine room temperature butter, peanut butter, brown sugar and white sugar and mix well
  2. 加入放至室溫的雞蛋和香草精混合好 Add egg (room temperature) and vanilla extract and combine well
  3. 用另外一個碗,把麵粉、玉米澱粉、蘇打粉和鹽混合好 Mix well flour, cornstarch, baking soda and salt in a separate bowl
  4. 慢慢分批把麵粉放進花生醬部分,慢慢攪拌均勻 Gradually stir the flour mixture into the peanut butter mixture and combine well
  5. 把曲奇團用保鮮膜蓋好放進冰箱30分鐘 Cover mixing bowl with plastic wrap and place the cookie dough in the fridge to chill for 30mins
  6. 預熱烤箱350F,在烤盤放上烘焙紙 Preheat oven to 350F.  Put a parchment paper on the baking try
  7. 用湯匙弄成球形,裹一層白砂糖,放在烤盤上,用叉壓兩下 Use a spoon to scoop the cookie dough.  Roll the dough to ball shape and roll thoroughly some granulated sugar.  Place the cookies on the baking tray.  Use the tines of a fork to gently make a criss-cross pattern
  8. 350F烤大概10分鐘直到曲奇周邊有點金黃色,裡面還是軟的,拿出來放涼就可以啦 Bake on 350F for about 10 mins.  Edges should be a little golden brown but still soft inside.  Take them out and let them cool.

我這個份量大概做了17片曲奇(大概4-5寸大),如果覺得太大,可以做小一點,但相信烤的時間也可以縮短到9分鐘左右。Based on this recipes, I have made around 17 cookies with a diameter of around 4-5 inches.  You can make it smaller if you want and perhaps only need to bake for around 9 mins.

這個曲奇西人大愛,一直停不下來吃,成功挑戰了這個傳統的曲奇,下次是時候再試做巧克力曲奇了!敬請期待!Mr Large loves this cookies and couldn’t stop eating it.  I’m already thinking my next challenge of another traditional cookies – chocolate chips cookies!  

About Me

Hi, I’m Joyce. I’m originally from Hong Kong, passionate about food, cooking, and travel. Thanks for visiting! 我是Joyce,來自香港,熱愛美食、烹飪、旅遊,謝謝你瀏覽我的網頁!

Subscribe to My Blog 訂閱我的博客

As an Amazon Associate, I earn commission from qualifying purchases.

COPYRIGHT@2020-2026 港姐廚房人生 Ms HK’s Kitchen

甜點初哥 Dessert Beginner

蘋果派餅 Apple Galette

港姐終於有廚房之後,興奮得一直上網看廚具,正所謂先欲善其事,必先利其器,港姐現在毫無興趣買衣服鞋包包,天天看各種鍋,每次西人看到我又再看烹飪視頻或者是鍋的時候,他就會翻白眼🙄說“you are so addicted”,曾經聽到好多人(尤其是年輕人)會問“喂,怎麼可以找到一個讓人非常passionate或者motivated的興趣愛好”,我通常會回應說“喂,真的有興趣,是不需要找,你自然而然就會去做”,就像我停不了看跟烹飪相關的東西,做飯從來不覺得累,早上起床,晚上睡前都在想煮什麼好呢?我真的是addicted。

Since I finally have a kitchen, I have been so excited and kept looking and shopping of all kinds of cookwares and tools online.  I’m no longer interested in buying new clothes, shoes or purse.  Whenever I’m looking at cooking video or shopping for cookware, Mr Large will roll his eyes and say “you are so addicted”.  I’ve heard a lot of people asking about how to find a habit that they will be passionate with.  I honestly don’t know but I strongly believe if there’s something you never get tired with, that’s it.  I know I’m addicted.

西人說廚房就是我的office,說的一點都沒錯,我一天煮三餐不覺得累,還打算給自己幾個挑戰,1)朋友口中的粵式廚師挑戰北方麵食,2)西式材料做中餐,3)掌握更多西式料理,4)做甜點!沒錯,甜點!我從來都不愛甜食,但耐可西人嗜甜如命,每次吃完飯都會問“what’s for dessert?”,既然現在”office”有個大烤箱,甜點材料在西方國家又是如此便宜和容易買到,港姐當然沒有任何藉口,是時候多學多做甜點了。

My kitchen is my office.  This is what Mr Large said.  I never get tired even I need to cook 3 meals a day everyday.  I’m actually giving myself some challenges in my “office”: 1) as a Southern Chinese to master Northern Chinese flour-cooked snacks e.g. dumplings, scallion pancake, etc.; 2) Cooking Chinese food with Western ingredients; 3) Better master western cuisine; 4) Making dessert!  I’m not obsessed of dessert at all.  Yet, Mr Large has super sweet tooth.  He always asks “what’s for dessert” after dinner.  Since now I have a decent oven in my “office” and dessert ingredients are so much cheaper and easily accessible here, I have no excuse not to make more dessert.

西人給我第一個挑戰是用蘋果做甜點,主要原因是之前住酒店時,因為疫情,酒店只發簡單的早餐,而每天的早餐包裡都有一個蘋果…..接到任務時候剛好在facebook看到一個蘋果派餅的食譜,看似非常的簡單,而家裡剛好有所有需要的材料,也造就了初哥第一個甜點的作品。

The first challenge Mr Large has given me is to make dessert with the apples that we’ve got from the hotel breakfast packs in the last 1 month during the lockdown.  It happened that I saw a recipe from facebook of apple galette.  It looks like an easy one and I’ve got all the ingredients.  I then decided that this is going to be my first homework.

作為初哥,我個人認為算是及格,派餅可以再薄一點,但整體味道還是不錯的,雖然賣相嘛….閨蜜看了照片說你的可麗餅可以再改進,可麗餅?我說這不是可麗餅呢….當場無語,哈!

As a beginner of dessert, I would say I pass.  Yet, the pastry could be thinner.  Presentation is what can be much more improved.  One of my girlfriends commented “you can further improve on this crepe”….THIS IS NOT CREPE! Ha!

做法相當的簡單,各位初哥也可以跟我一起嘗試一下。 It’s very simple and easy.  Everyone can try even without much baking experience.

派皮材料 Pastry Ingredients:麵粉 Flour 1 1/4 cup, 糖 Sugar 1 tbsp,鹽 Salt 1/2 tsp,黃油 Butter 113g,蘋果醋 Apple Cider Vinegar 1 tbsp,冰水 Ice cold water 1/4 cup

蘋果餡材料 Fillings Ingredients: 3-4 蘋果 Apple,糖 Sugar 1/3 cup,檸檬汁 Lemon juice 1 tbsp,肉桂粉 Cinnamon 1/4 tsp,黃油 Butter 1 tbsp

做法 Steps:

  • 派皮材料混合好,輕輕揉成團,用保鮮膜包好放進冰箱30分鐘 Mix all the pastry ingredients and make a dough.  Wrap with plastic wrap and chill for 30 mins
  • 蘋果削皮切片,放進鍋裡加入其它材料中慢火煮直到蘋果變軟 Peel the apples and cut into thin slices.  Cook the apple slices with all other ingredients in low medium heat until apples are soft.
  • 將派皮麵團分成四份,擀成圓形 Cut the dough into 4 portions.  Roll them into thin round slice
  • 放進蘋果餡後,將邊邊輕輕包好 Put the apples and wrap the sides of the pastry
  • 在派餅邊涂上蛋液,再撒一點點糖 Put on some egg wash along the sides of the pie and some sugar
  • 烤箱425F預熱,烤25分鐘,淋一點蜂蜜和撒上一點肉桂粉裝飾(也可以撒糖分)Pre-heat oven at 425F,bake the pies for around 25 mins.  Serve with some honey and cinnamon (or icing sugar)

這週打算烤曲奇,也算是挺簡單的,再練習一下就挑戰蛋糕!This week’s challenge is cookies.  It’s also very simple.  Need more practice and then I will start baking some cakes!

歡迎訂閱我以下的社交媒體頻道,謝謝支持!Please subscribe to my social media page and channel! Thanks for the support!

As an Amazon Associate, I earn commission from qualifying purchases.

COPYRIGHT@2020-2026 港姐廚房人生 Ms HK’s Kitchen

蛋的學問

我相信大家都希望這次可怕的疫情盡快結束,但我更希望,這次疫情可以讓大家有更多的反思,尤其是對人生的價值觀、環保、健康、飲食習慣等等,至少我身邊的好朋友家人現在都比較關注健康的飲食習慣了,也許跟在隔離期間被逼要做飯也有些關係。

自從去年一月開始輕斷食,我一直有研究各種健康飲食和食材的營養知識,越研究越感興趣,也希望能有機會跟大家分享一下我的研究結果,再分享一些相關的食譜。

今天想跟大家分享的食材是“雞蛋”。

一直對雞蛋有個情意結,不管是從健康還是做飯角度,我對雞蛋都特別糾結。說到雞蛋大家會想到什麼?蛋白質?膽固醇?到底雞蛋是個健康的還是不健康的食材?猛男為了健身不是一天吃5、6、7、8顆雞蛋嗎?明明蛋黃就最香,但偏偏又說膽固醇很高。另外一個糾結是,蛋料理是眾多料理中比較難做好的,為什麼?簡單說 – 熟太快,時間太短,行錯一步,不給你機會扭轉局面!

雞蛋還有一個讓我糾結的點是跟食品安全有關,就算再有營養,我在內地生活的時候,不太敢吃雞蛋,對大陸雞蛋的安全隱患有相當的擔憂,你會說雞蛋那麼便宜也會假,就是會!某年在北京,我買過一盒雞蛋,回去煎個荷包蛋,煎完感覺是放在餐廳櫥窗的塑料蛋,二話不說就丟掉。

本來糾結嘛就乾脆不吃好了,但認識了西人後,逃離不了雞蛋,你要知道雞蛋和牛奶對於一個西方家庭來說是多麼的重要,根本不能不吃雞蛋,所以我逼於無奈也要對雞蛋進行深入的研究。

好了,說了那麼多廢話,那麼到底雞蛋有什麼營養,有什麼要注意?

首先,給大家一些基本的資料,一顆50g的雞蛋,熱量大概是70大卡,當中含大概6g的蛋白質。除了蛋白質,雞蛋含有多種維他命,包括維他命A、核黃素(即B2)、泛酸(即B5)、葉酸(即B9)、B12、膽鹼和維他命D等等,也含豐富的礦物質,例如磷、鋅、鐵等等。

雞蛋有豐富營養是毫無疑問,那麼膽固醇呢?雞蛋裡的膽固醇主要來自於雞蛋黃裡的脂肪,一顆50g的雞蛋裡大概有187mg的膽固醇,而專家建議每天膽固醇的攝取量是300mg,當然也是因人而異,譬如你本身屬於心血管疾病高風險群體,任何含膽固醇的食物都要注意攝取量。

研究下來,發現對於雞蛋裡的膽固醇跟心血管疾病的關聯有很多不同研究,當中也有很多不同的意見,比較多偏向於認為關聯低,主要的爭論點在膽固醇主要來源還是脂肪本身,而蛋黃里只有5g的脂肪,而當中只有27%是飽和脂肪(就是不好的脂肪)。

研究了那麼多,我認為如果你本身不屬於患心血管疾病的高風險群體,平均一天1顆雞蛋我認為是沒有問題,其實整體膽固醇的高低還是取決於整體的飲食習慣,畢竟雞蛋裡有豐富的維他命和礦物質,要是害怕膽固醇而放棄了雞蛋的其他營養元素,我認為也不是最佳辦法,減少脂肪的攝取量才是更重要,但聽說脂肪也有好壞,這個我下次研究和分享。

我一直都知道雞蛋營養很豐富,但在研究雞蛋的各種營養中,讓我學到的新知識是葉酸,才知道葉酸原來就是維他命B9,提到葉酸大家第一個聯想估計是孕婦,沒錯,葉酸對孕婦是一種很重要的營養素,因為人體在製造DNA、RNA,以及製造細胞分裂需要的胺基酸代謝時,都必須要用到葉酸,因此,葉酸對神經管的形成很重要,也就是對胎兒的正常發育很重要。

那麼是不是只有孕婦才需要葉酸呢?我研究下來,發現並不是,首先人體無法自行製造葉酸,因此葉酸屬於人體必需的維生素,也就是必須透過食物來攝取,有一些研究表示葉酸對於減低中風、心血管疾病風險和改善二型糖尿病都有幫助。

一般建議從食物裡面攝取葉酸,很多食物都含有豐富的葉酸,例如菠菜、雞蛋等等,至於一些人工合成的葉酸補充品,建議大家要咨詢一下家庭醫生才服用,因為畢竟對於長期高劑量攝取葉酸是否對身體有副作用還是未知。

真讓我漲知識,也讓我更放心食用雞蛋,當然,要買到好質量的雞蛋也很重要,就像我之前說的,在內地買到過無良商人的假雞蛋還是讓我對雞蛋的質量很擔心。

現在身處美國的我,對食品安全雖然會放心不少,但也不能太掉以輕心。在美國買雞蛋,發現除了寫著Large或者Extra Large,上面還會有一個等級(Grade),有Grade A、AA等,我當然要研究一下是什麼,原來就是代表質量的高低,但很有趣的是,這個等級的分類,也教育了我如何透過看雞蛋的濃稠度和形狀來判斷雞蛋的等級,一般零售店只有Grade AA和Grade A,因為Grade B一般不會直接食用,更多是用來做其它食物製成品。老實說,這邊的雞蛋真的是既便宜質量又高很多,一盒12顆雞蛋,大概在$1.5-2之間,在內地,花大錢都買不到讓人放心的雞蛋。

之前提到了,因為西人愛蛋,自我認識他以後,從我不太會做蛋料理,到我現在做蛋omlete順手拿來,真的要感謝他,因為再好的雞蛋我們都不太敢吃太生,而且我們愛蛋有點焦的香氣,所以名廚Gordon的滑蛋以前住內地不敢嘗試,以後要是武功練成可以跟大家分享。

名廚的滑蛋需要放很多黃油和一直攪拌,我的呢,黃油也是放挺多,但反正我做不了滑蛋,我就乾脆會有點耐性,中小火讓雞蛋略為成一點點形才攪拌和反過來,這樣能煎出蛋香又不會太老。配料我一般會放洋蔥碎、菠菜、蒜末、芝士,有時候也會放一些牛奶,一般先把蔬菜類略炒軟,加鹽黑胡椒調味,再放雞蛋,雞蛋略為成型後,放入芝士和黃油(對,再放一些黃油才香!)。這些就是我過去做過的早餐隨意蛋。回看過去的照片才發現自己的進步,一點一點,很開心!

除了早餐,因為有個好朋友是素食者,他來我家作客的話,我基本上都一定會做一道蛋料理,之前看很多facebook視頻教做日式蛋卷,我也買了個神器來做蛋卷,好朋友是台灣人,因此我就用了日本蛋卷概念做了一個蔥花菜脯蛋卷,做法很簡單,雞蛋要加一點雞湯、鹽、米酒調味,菜譜切碎炒香跟蔥花一起放入雞蛋液裡,然後就像大部分視頻教大家一樣,一層煎得差不多捲起來,再加蛋液,就這樣一層層煎,再卷就成為蛋卷了。很抱歉之前做的時候,沒有錄製視頻,以後可以有一些教學視頻,更好的讓大家“看”明白到底我在說什麼,哈哈!

我還在研究更多不同的蛋料理,譬如香港人最愛的蒸水蛋、鹹蛋蒸肉餅(可惜美國買不到鹹蛋!)、蝦仁炒蛋等等,還有蛋餃、水波蛋、等等。

歡迎訂閱我以下的社交媒體頻道,謝謝支持!Please subscribe to my social media page and channel! Thanks for the support!

As an Amazon Associate, I earn commission from qualifying purchases.

COPYRIGHT@2020-2026 港姐廚房人生 Ms HK’s Kitchen
西多士 French Toast

西多士 French Toast

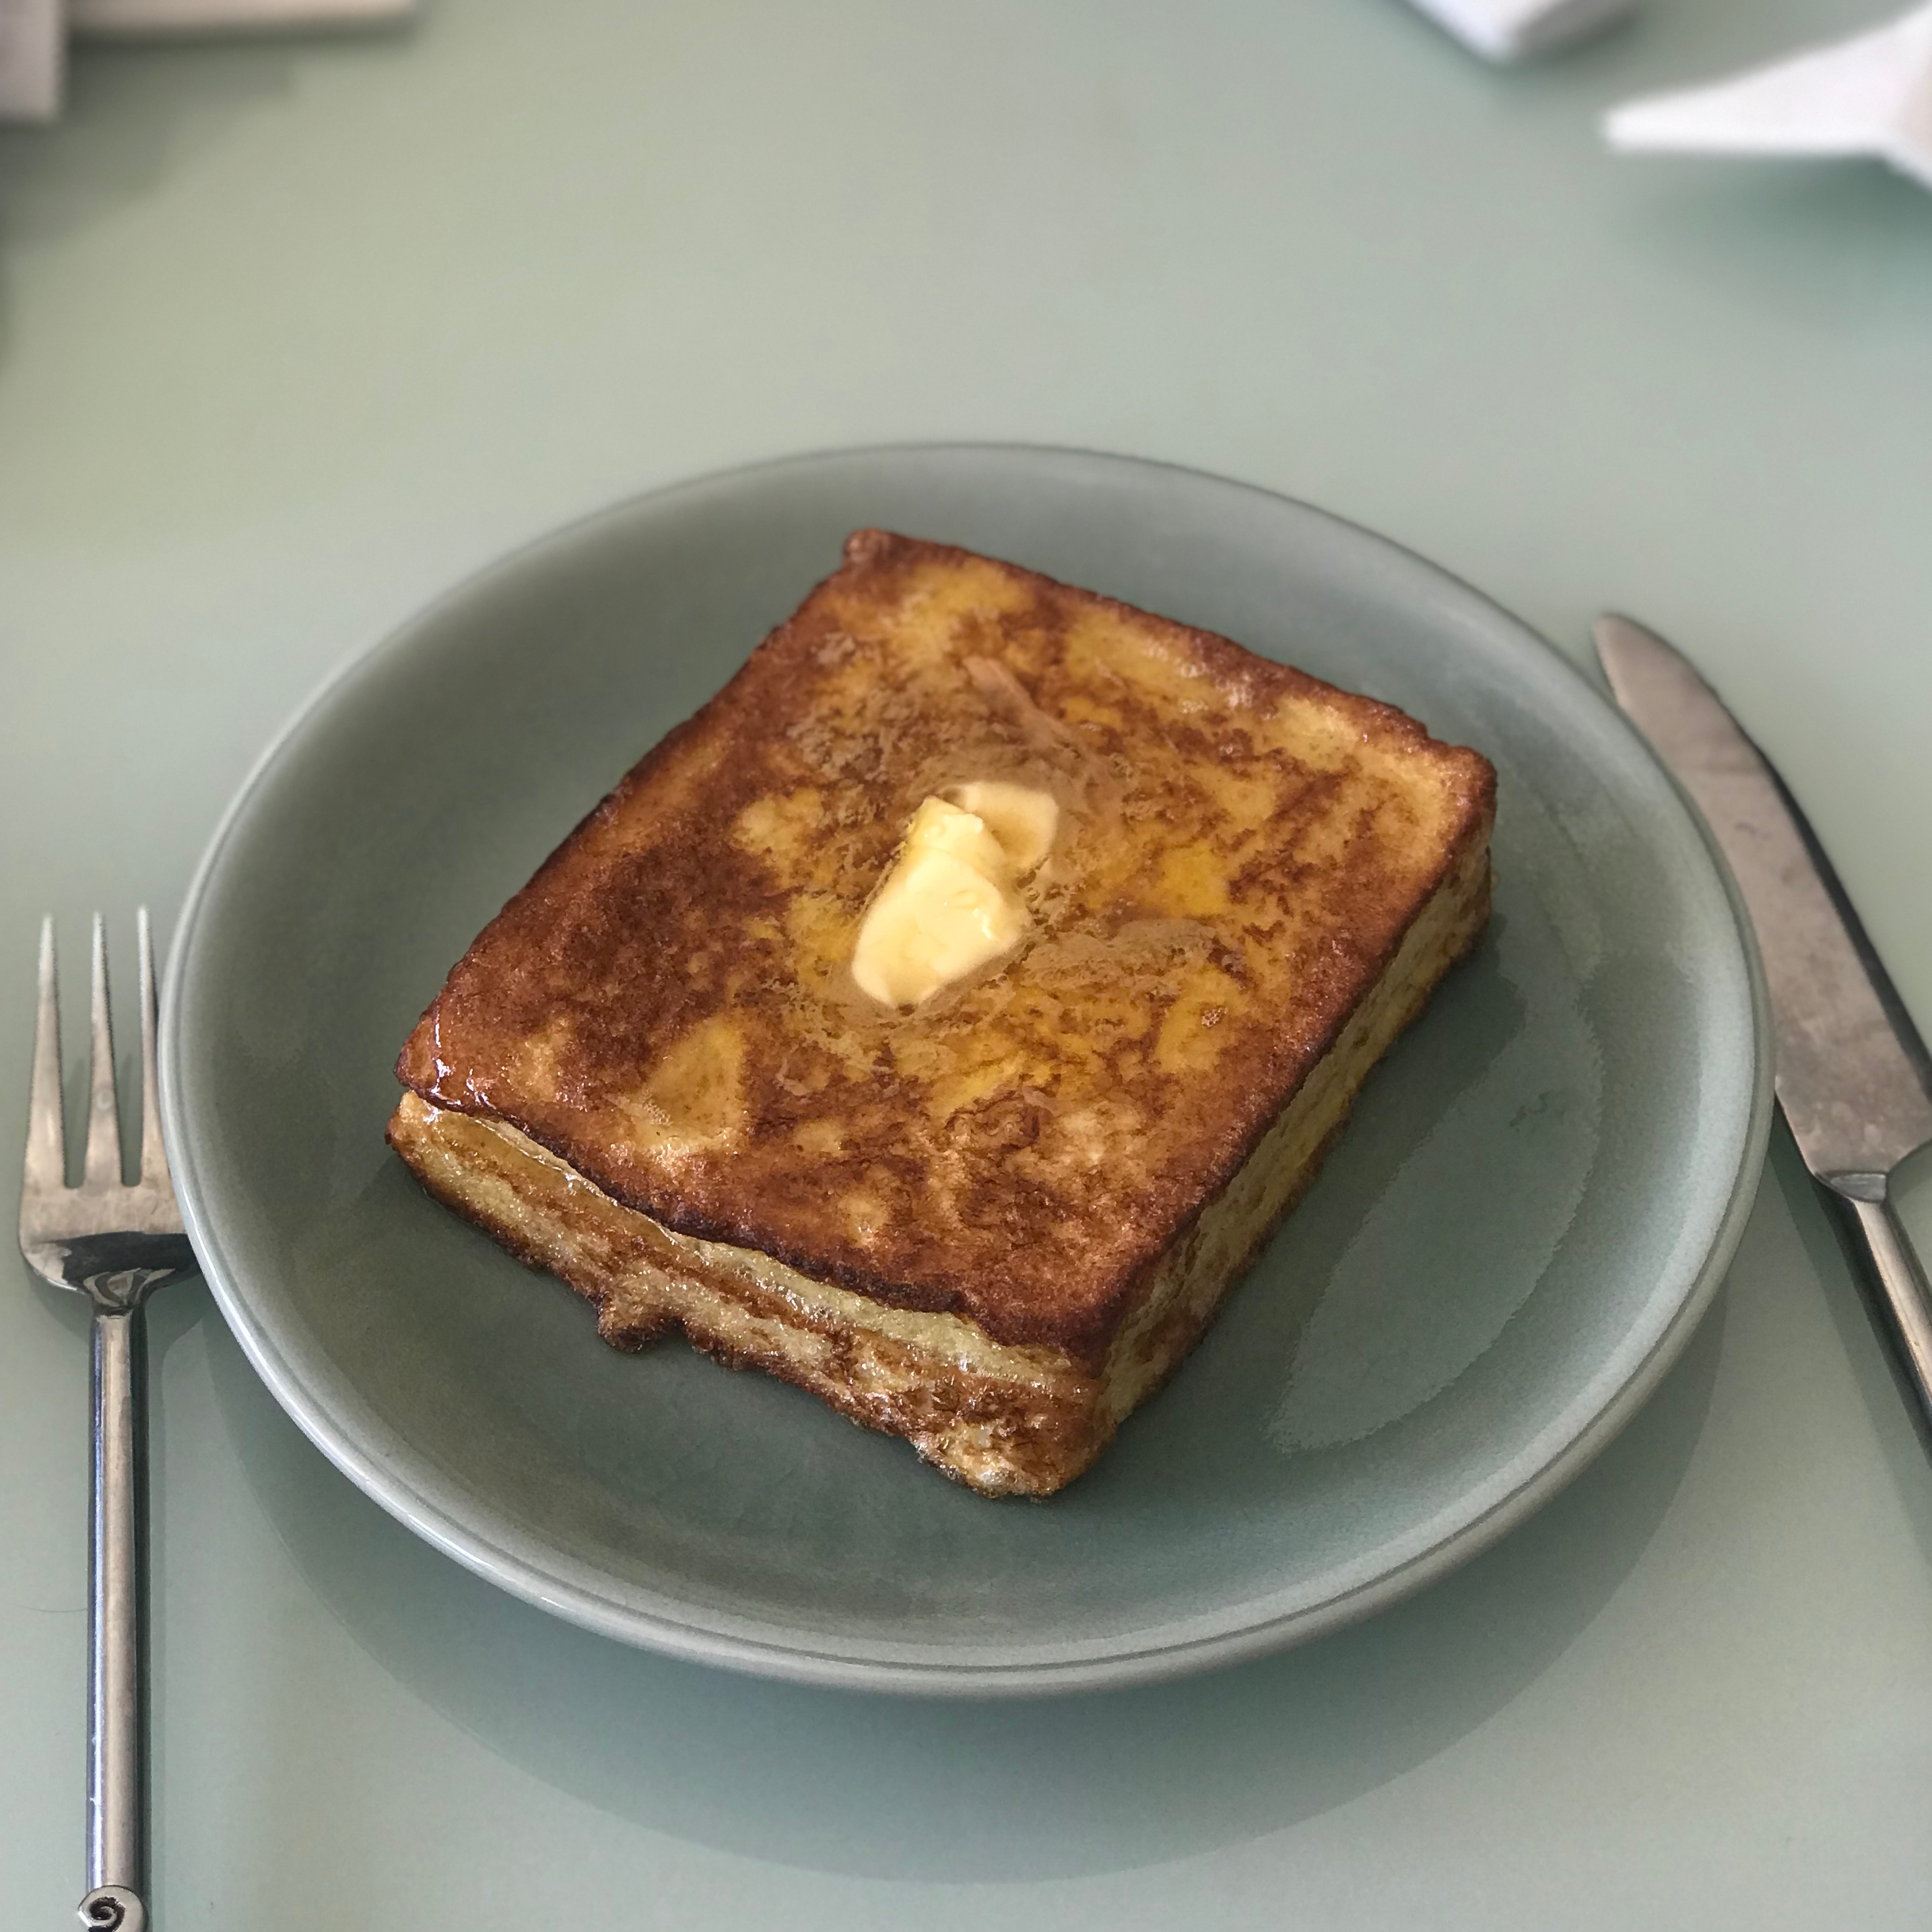
說到港式茶餐廳我的最愛,西多士應該名列前三,要是大家知道茶餐廳的由來,大家應該知道是平民化的西式下午茶聚腳點,也是殖民地的產物之一,所以,所有的食物都是帶點東方特色的西餐(所謂的豉油西餐)。

“Cha Chaan Teng” is a type of restaurant commonly found in Hong Kong. In the old days, western cuisine in Hong Kong was a privilege for the upper class, not for the locals. “Cha Chaan Teng” was then developed to offer affordable western food for the lower class incomes. “Cha Chaan Teng” has also adopted the local taste which turn out to what we called it soy sauce western food i.e. HK-style western food. “French toast” is one of the classic western food in “Cha Chaan Teng” and of course also my favourite.

蜂蜜版本 Syrup Version

西多士就是西式French Toast的變身,其實就是煎香裹了雞蛋液的麵包(茶餐廳一般是炸的),淋上黃油和糖漿,茶餐廳的版本也有演變過程,我記得小時候吃的裡面沒有抹花生醬,當然更不用說現在更多的版本什麼一口西多士,坦白說,新不如舊!

家裡絕對能自己做西多士,簡單說一下做法,麵包邊切掉,抹花生醬,裹上蛋液,一定要確保吸滿了蛋液,煎鍋放少許油,慢火把兩邊煎香,放黃油和淋上糖漿。

我比較愛的版本是淋上煉乳,沒有糖漿當然也可以淋上蜂蜜啦!

“Cha Chaan Teng” version “French Toast” is basically 70% similar to the French “French Toast”. It’s very easy to make. You just need 2 pieces of bread, one egg, peanut butter, butter and syrup. Spread the peanut butter and make a sandwich. Beat the egg and then soak the peanut butter sandwich in the egg. Heat up pan and melt butter. Pan fry the peanut butter sandwich until both sides are golden brown. Serve with butter and syrup. I personally prefer to put condensed milk instead of syrup. This would taste even more “HK-style”. Now, in many “Cha Chaan Teng” outside of Hong Kong, they try to do some innovation of “French Toast”. I honestly still prefer so much more of this traditional HK-style french toast than any new innovation.

煉乳版本 Condensed Milk Version

西多士一定要切成九塊才吃,為什麼?沒有為什麼,這就是香港獨有的特色!Besides, we always cut the french toast in 9 pieces like above. Don’t ask me why. This is just simply a HK-Style!

歡迎訂閱我以下的社交媒體頻道,謝謝支持!Please subscribe to my social media page and channel! Thanks for the support!

As an Amazon Associate, I earn commission from qualifying purchases.

COPYRIGHT@2020-2026 港姐廚房人生 Ms HK’s Kitchen
吃草的藝術 Art of Vegetarian

吃草的藝術 – 芝士櫛瓜 Easy Cheesy Zucchini

我不能說我提倡素食,因為我覺得只能吃素要又能營養均衡很難,但身邊吃素的朋友越來越多,雖然我不是素食者,但說實在話,我是那種一天(甚至一餐)少吃點蔬菜都覺得渾身不舒服的人,所以,我也愛研究更多素食的食譜。

I’m not a vegetarian.  Yet, I’m that kind of person that I need veggie in almost every meal.  I also have some friends who are vegetarian and thus I like studying and working on vegan recipes.

最近因為某些原因,在middle of somewhere已經住上了近一個月但仍然沒有廚房,不能做飯我是會憂鬱症的,酒店房間只有個微波爐,在逆境中,我發揮了我的小宇宙,在酒店附近一家百貨公司買了一個小小電鍋,就憑這鍋滿足我做飯的小小慾望。

Due to some reasons, I have no kitchen since I’m here at the middle of somewhere.  I’d be very depressed if I couldn’t cook.  Therefore, I’ve bought a tiny electric frying pan from the department store nearby the hotel here.  This tiny pan has already made my life so much better here!

就在這僅有的工具下,昨晚做了兩個菜做晚餐,包括了這個芝士櫛瓜,這其實是西人媽媽的方子,之前逛超市看到漂亮又便宜的櫛瓜,我說要買來做,西人說他媽媽一個房子是放芝士的,透過西人簡單說一下(真的很簡單),我揣摩了一下,做出了這個讓我覺得驚艷的櫛瓜,櫛瓜的甜跟芝士配合的天衣無縫,這個菜毫無難度、健康又好吃。

Given very limited cooking tool, I’ve made two dishes for dinner last night, including this Easy Cheesy Zucchini.  It’s actually a recipe from Mr. Large’s mom.  Based on what he describes (very briefly!), I’ve successfully made this delicious zucchini dish.  The sweetness of the zucchini is a perfect match with cheese.  It’s easy, healthy and delicious!

芝士櫛瓜 Easy Cheesy Zucchini

材料:櫛瓜片,黃油,芝士,鹽 Ingredients: Zucchini slices, butter, cheese, salt

  1. 黃油起鍋,放櫛瓜片,略炒,放鹽調味 Melt butter in the pan in medium heat.  Add zucchini slices and season with salt.  Stir fry until zucchini is soften
  2. 加入芝士,拌勻 Add and mix cheese into the zucchini
  3. 最後再撒上少許芝士,放入微波爐加熱30秒讓芝士溶化 Set them aside.  Add more cheese.  Microwave 30 seconds and serve

真的簡單到沒朋友,快來做做看吧,你會喜出望外!

This is really simple.  Let’s try to make it for dinner tonight.  You’ll be surprised how good this is!

歡迎訂閱我以下的社交媒體頻道,謝謝支持!Please subscribe to my social media page and channel! Thanks for the support!

As an Amazon Associate, I earn commission from qualifying purchases.

COPYRIGHT@2020-2026 港姐廚房人生 Ms HK’s Kitchen

最簡單亦最難 – 煎牛排 Steak Dinner

西餐不是我強項,煎牛排更不是,你以為你買到貴的牛排就可以是大錯特錯,因為要是煎不好你就毀了它偉大的使命。

Western cooking is not my expertise.  Making steak is definitely not either.  Don’t think that you are able to make a good steak by just buying an expensive steak.  If you make it wrong, you are going to ruin the expensive steak. 

這個牛排我是情人節在朋友LA的guest house做的,不是自己的廚房,所以也得適應了一下,也為了方便、,就買那種蒜加香草味的黃油,最後做出來還是挺滿意的,配菜有西蘭花胡蘿蔔,當然怎麼可以少了西人最愛的土豆呢?

I made this steak at the guest home of our friend in LA on the Valentine’s Day.  It’s not my own kitchen and for convenient sake, I used garlic herb butter bought from grocery store. I’m glad that Mr Large likes it very much.

自問真的不算很會做,研究過很多的食譜也當然實驗過無數次(當然也是失敗過無數次),目前總結了幾點想跟大家分享一下。I’m definitely not an expertise on this.  I’ve been doing a lot of researches and also experiments.  Here to share what I have found out so far.

  1. 牛排要從冰箱拿出來放大概至少30分鐘,等肉跟室溫差不多,只有這樣你才好掌握熟成的程度。
  2. 牛排先用橄欖油、鹽和黑胡椒按摩一下(對,我一般會按摩一下)。
  3. 煎的時候,火候要夠大,這樣才可以一下子把外層煎熟然後封住肉汁。
  4. 每面煎一分鐘就轉面一次,一般每一面需要煎4-7分鐘,視乎你要的生熟程度。
  5. 煎到差不多熟,放黃油和香草,然後一直用溶化的黃油淋在牛排上。
  6. 生熟程度就是看肉質軟硬程度,或者是量度肉的問題,估計大家在網上看到過很多的分享。
  7. 我也試過因為買的牛排比較厚,西人又不太喜歡太生的牛排,但一直煎油煙太厲害了,所以,我就會每一面煎大概最多5分鐘就放進烤箱烤,兩種烤的方式,一個是用上層烤2-3分鐘(Broil),另外一個是上下烤不多於10分鐘(Bake模式),一般我用大概300F(150C)左右,最後趁熱的時候再放點黃油。
  8. 我也看到過一些食譜是先烤,烤到要的生熟程度再上火把兩邊煎香,還沒試過,打算下次試試這種方式。
  9. 最後是,牛排煎好不能立即切,要讓牛排休息個10分鐘(是有多累啊!),因為肉汁在熱的時候就會全流出來了。
  1. You need to let your steak to be at room temperature before it’s cooked.  So, please take it out from the refrigerator at least 30 mins prior to cooking.
  2. Season with olive oil, salt and black pepper.  (and I would massage the steak!)
  3. Your pan needs to be hot enough when you put your steak on it.
  4. Pan fry 1 min on one side and flip to the other side for another 1 min.  Keep doing this until each side is cooked for around 4-7 mins (depending on your desire degree of doneness).
  5. When it’s about to be done, add garlic, butter and herbs.  Turn to medium heat and keep pouring the melted butter on the steak.
  6. There should be a lot of reference online in terms of how to determine the degree of doneness.  I usually just check the tenderness of the meat.
  7. I have got some steak which is rather thick.  Since Mr Large doesn’t like it too raw while it produces too much of smoke when I pan fry the steak, I therefore would only cook each side for around 5 mins.  Then, I would put it in the oven to continue cooking.  I would do either broil for 2-3 mins or bake for no more than 10 mins at 300F (150C).  Add more butter at the end when it’s done
  8. I have seen some recipes are to bake the steak first to the degree of the doneness you want and then pan fry the two sides at the end.
  9. Lastly, please let the steak sit for 10 mins before you cut it.  This is to make sure the meat juice won’t all come out when you cut it.

必須說我還是煎牛排的初哥,還在揣摩各種煎烤牛排的方式,西方國家肉都比亞洲便宜,估計以後實驗的機會會更多了。

To be honest, I’m still a rookie at making steak.  Still have a lot to learn and need practice.  Meat is much cheaper here.  I believe that I’ll have lot more chances to experiment!

歡迎訂閱我以下的社交媒體頻道,謝謝支持!Please subscribe to my social media page and channel! Thanks for the support!

As an Amazon Associate, I earn commission from qualifying purchases.

COPYRIGHT@2020-2026 港姐廚房人生 Ms HK’s Kitchen

Create your own website, free on WordPress.com.Create your own website.
Start free