最好吃的自家製叉燒 The BEST Home Made Cha Siu

有沒有想過在家也能做出像燒味店一樣好吃的叉燒呢?只要你有烤箱,就可以做到,港姐還有個絕密醬料和技巧心得,想知道是什麼?看完這個視頻你就會知道!

Have you ever thought that you can make store-bought like Cha Siu (Chinese Barbecue Pork)? You only need to have an oven at home, you can make it happen. Ms HK will also share her secret ingredients and tips. Wanna know more? Click and watch this video!

總結一下幾個心得 To summarize a few tips:

  • 心得一:選對部分很重要! Tips 1: Pick the right meat portion
  • 心得二:豬肉大小切適中 Tips 2: Cut the meat in right size
  • 心得三:醬料需要花心思!Tips 3: Spend effort to find the sauce
  • 心得四:正确焗烤有竅門!Baking it right is the key

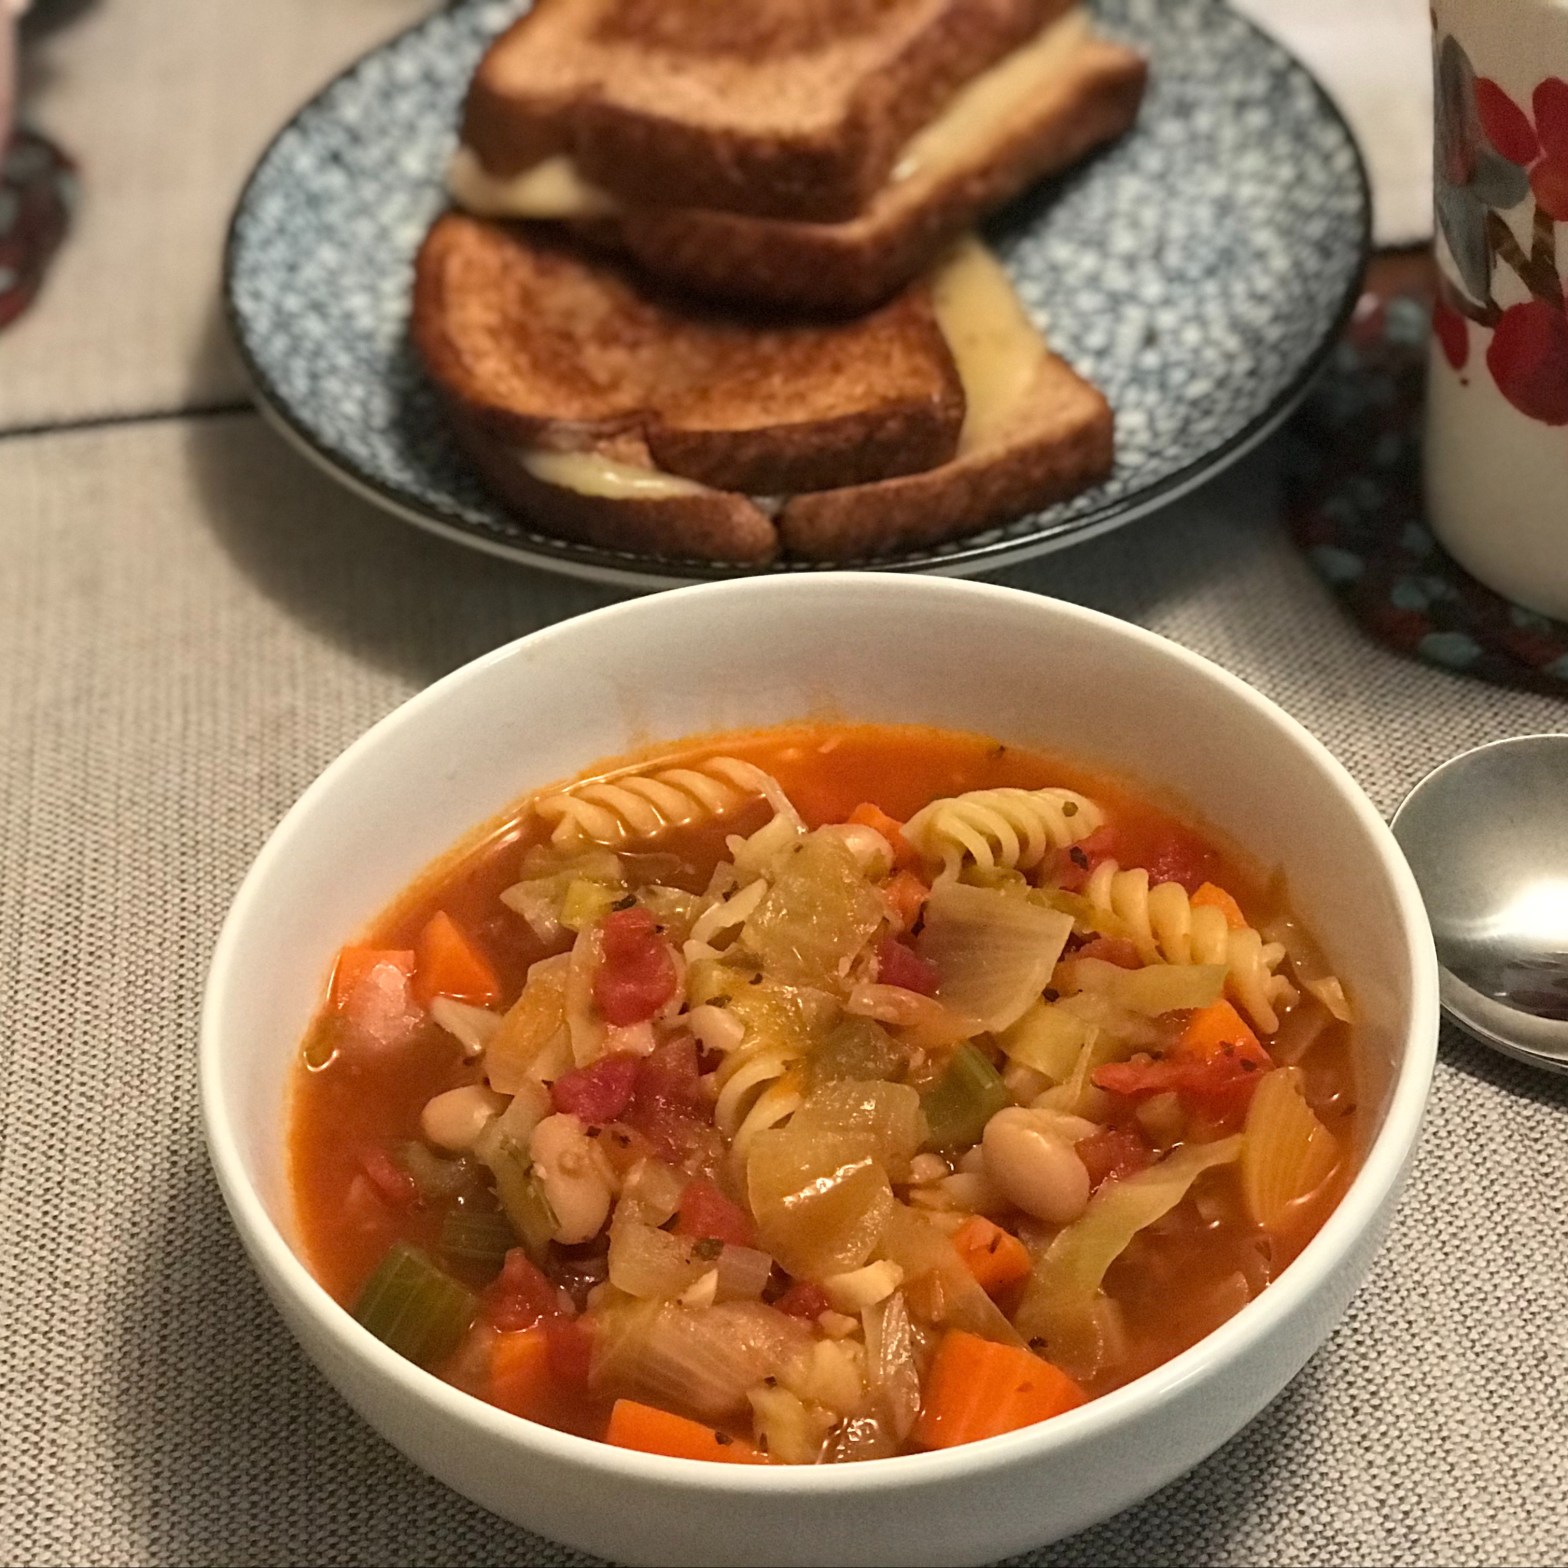
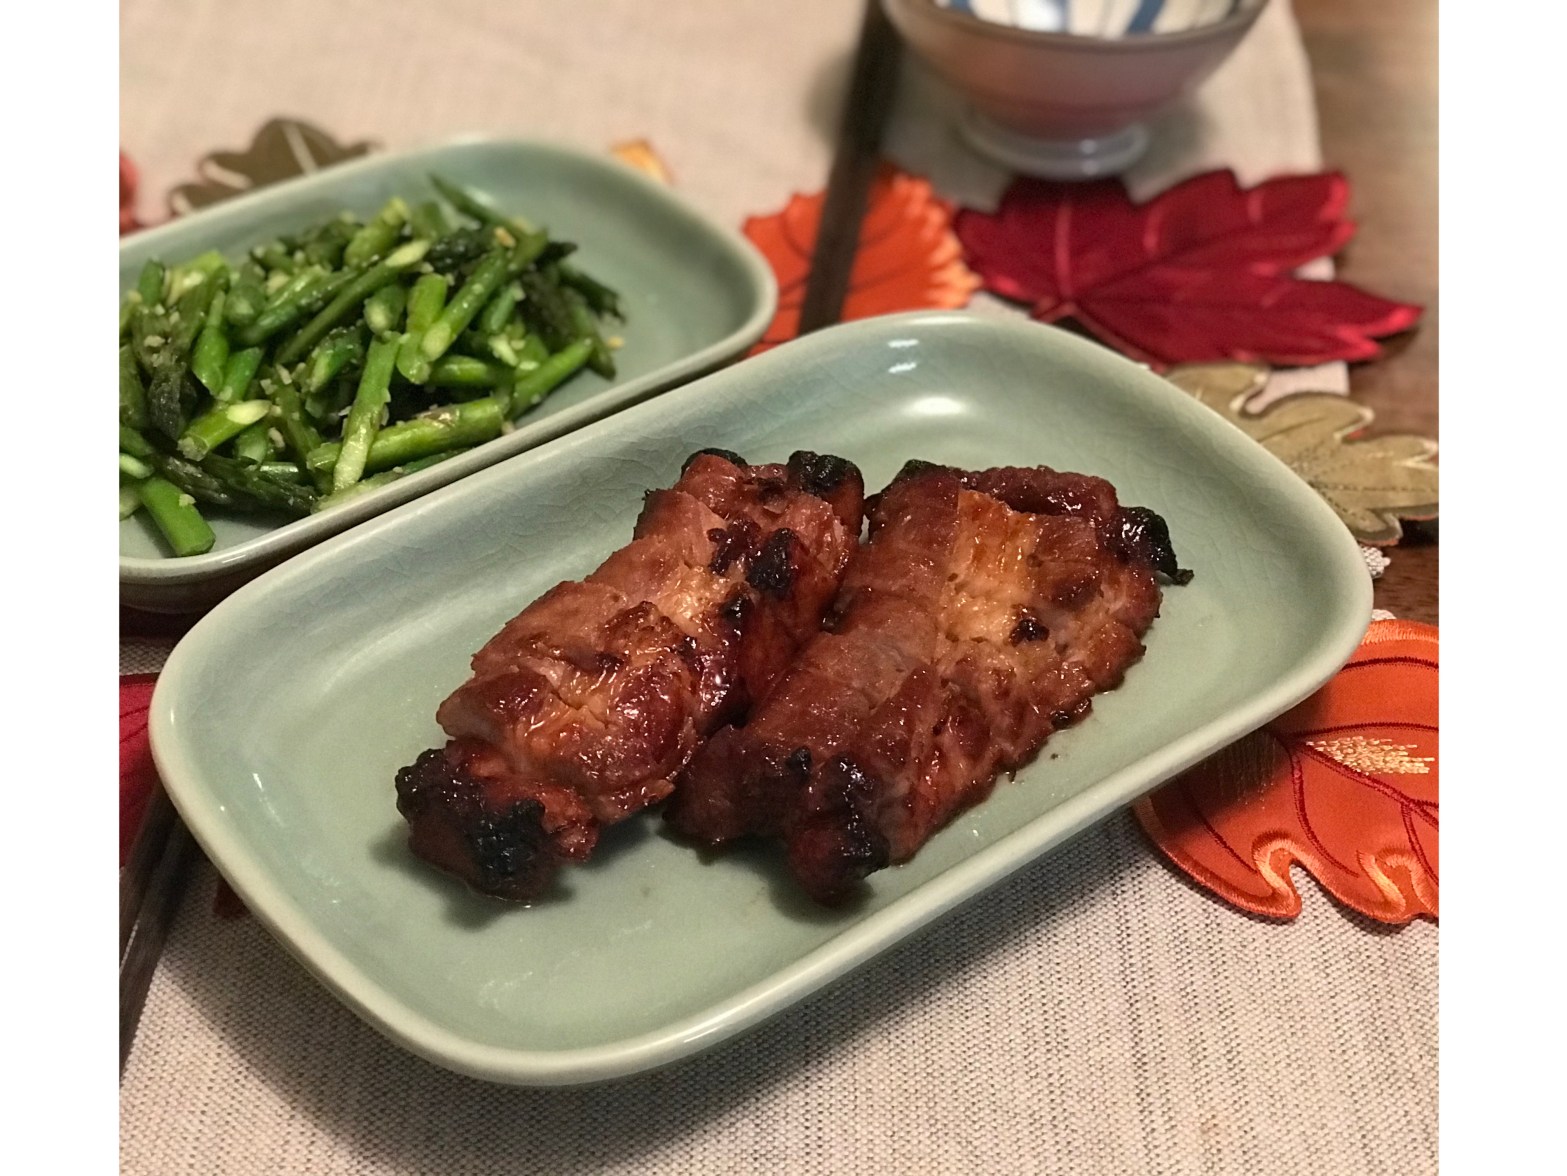
最好吃的自家製叉燒 The BEST Home Made Cha Siu (Chinese Barbecue Pork)


份量
Servings

準備時間
Prep Time

烹調時間
Cook Time

難度
Difficulty
24 hours40 mins★★

材料 INGREDIENTS

❑ 200克梅頭肉2條;2 pieces of 200g Pork Shoulder

❑ 海鮮醬一湯匙;1 tbsp Hoisin Sauce

❑ 燒烤醬或叉燒醬一湯匙;1 tbsp Barbecue Sauce or Cha Siu Sauce

❑ 豉油一湯匙;1 tbsp Soy Sauce

❑ 南乳汁一湯匙;1 tbsp Red Fermented Beancurd Sauce


做法 DIRECTIONS

  1. 梅頭肉切成1-1.5寸厚、2.5-3寸寬的長條形;Cut pork shoulder into 1-1.5 inch thick and 2.5-3 inch wide long shape
  2. 混合各種醬料,醃製梅頭肉至少4小時或過夜;Mix all sauces and marinate the pork shoulder for at least 4 hours or overnight
  3. 預熱烤箱400F;Preheat oven at 400F
  4. 烤盤舖一層鋁箔紙,放上烤架,把醃製好的叉燒放在烤架上,放進烤箱烤35分鐘;Place some foil on the baking tray and put a baking rack on top of it. Place the marinated pork shoulder on the rack. Bake at 400F for 35 mins
  5. 取出烤熟的叉燒(可用溫度計測試肉裡溫度,超過165F就可以),兩面塗上蜂蜜;Take the cooked Cha Siu out from the oven (Check the temperature. It’s cooked if it reaches 165F). Brush some honey on both sides
  6. 把烤箱轉為上層燒烤模式,把叉燒放回烤箱,高火烤5分鐘;Turn the oven to broil or top grill mode. Put the Cha Siu back. Bake at High for 5 mins
重要提醒 Important Reminders:
  • 買不到叉燒醬,可以於超市看看有沒有亞洲風味的燒烤醬,就是裡面會有一些番茄、蒜、薑等調料,沒有的話,買一般的燒烤醬,再加點番茄醬、蒜粉等;If you can’t find Cha Siu Sauce, try to check out if there is any Asian style barbecue sauce at your local stores. There should be tomato, garlic, ginger etc in the sauce. If not, then just buy a regular barbecue sauce and add a little of ketchup and garlic powder.
  • 如沒有可放在烤盤上的烤架,可以直接用烤箱裡的烤架,但需要在下面放一個烤盤盛著焗烤時的肉汁;If you don’t have a separate baking rack to put on your baking tray, you can use the rack come with the oven but put a baking tray in the lower rack as there’ll be meat juice coming out during baking.
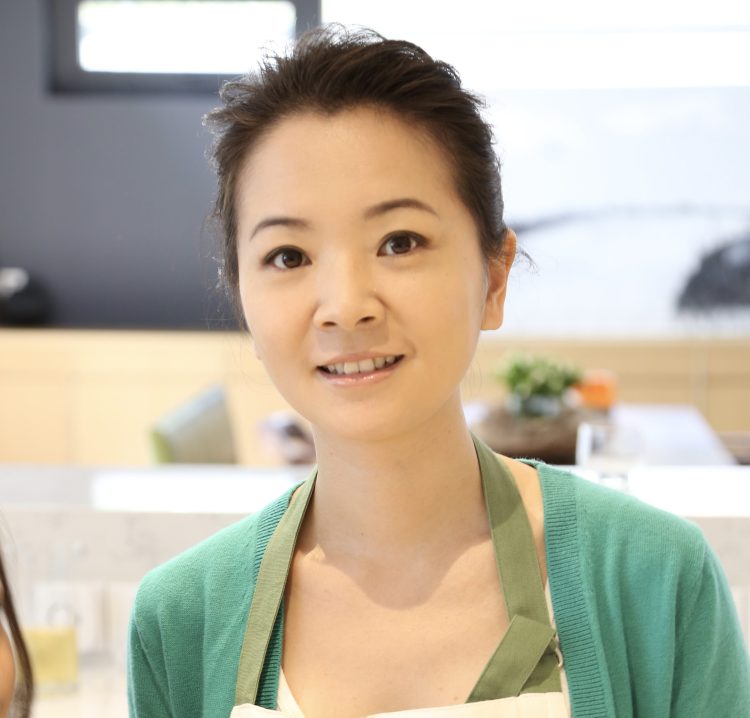
About Me

Hi, I’m Joyce. I’m originally from Hong Kong, passionate about food, cooking, and travel. Thanks for visiting! 我是Joyce,來自香港,熱愛美食、烹飪、旅遊,謝謝你瀏覽我的網頁!

Subscribe to My Blog 訂閱我的博客

COPYRIGHT@2020 港姐廚房人生 Ms HK’s Kitchen

粟米肉粒飯 Sweet Corn Pork Rice Dish

茶餐廳最經典的碟頭飯是什麼?我絕對投粟米肉粒飯一票!這道菜,不僅美味,還有一個有趣的英文名字,叫“Show Me Your Love”。我最喜歡將事情簡單化,今天就為大家介紹這個懶人版的簡易粟米肉粒飯。材料非常簡單,基本上你隨時都可以在家裡做到!

What is the most classic dish in a Hong Kong café (Cha Chaan Teng)? My vote goes to Sweet Corn Pork with Rice, also whimsically known as “Show Me Your Love” in English. I love to keep things simple, so I’m sharing this super easy (lazy) version of the dish. The ingredients are so basic that you probably have them at home all the time!

粟米肉粒飯 Sweet Corn Pork Rice Dish


份量
Servings

準備時間
Prep Time

烹調時間
Cook Time

難度
Difficulty
110 mins20 mins

材料 INGREDIENTS

❑ 豬肉100克;100 g pork

❑ 粟米蓉1/2-1罐(視乎你想要多少汁);1/2-1 can of creamy sauce (depends on how much sauce you want)

❑ 原粒粟米(可選);additional corns (optional)

❑ 雞蛋一隻;1 egg

❑ 白飯一碗;1 bowl of rice


做法 DIRECTIONS

  1. 豬肉切粒,先用豉油、糖、麻油和粟粉醃20分鐘 Cut the pork into small dices.  Marinate with soy sauce, sugar, sesame oil and cornstarch for 20 mins
  2. 雞蛋簡單打勻 Slightly beat the egg
  3. 中火把油燒熱 Heat up some olive oil
  4. 加入豬肉,先把豬肉炒熟 Add pork.  Stir fry until cooked
  5. 加入粟米,炒勻 Add corns.  Stir well
  6. 加入粟米蓉 Add creamy corn
  7. 加入鹽、胡椒粉調味 Season with salt and pepper
  8. 加入雞蛋,拌勻即可 Add beaten egg. Serve warm

完美粟米肉粒飯的小貼士 Tips for the Perfect Sweet Corn Pork with Rice

  • 選擇優質豬肉: 選擇新鮮、高品質的豬里脊肉,以獲得最佳的風味和口感。Choose Quality Pork: Opt for fresh, high-quality pork loin for the best flavor and texture.
  • 平衡味道: 根據個人口味調整調味料。你可以加入少許芝麻油或撒上一些蔥花,增添風味。Balance the Flavors: Adjust the seasoning to your taste. You can add a dash of sesame oil or a sprinkle of green onions for extra flavor.
  • 健康版: 為了更健康,你可以使用糙米或加入更多蔬菜,如青椒和胡蘿蔔。Healthy Twist: For a healthier version, you can use brown rice or add more vegetables like bell peppers and carrots.

為什麼這道菜是茶餐廳的最愛 Why This Dish is a Cha Chaan Teng Favorite

粟米肉粒飯是香港許多茶餐廳菜單上的主食。它結合了鮮美的豬肉和甜玉米,創造出美妙的味覺對比,吸引所有味蕾。此外,這是一道快捷簡單的菜餚,可以在短時間內完成,非常適合繁忙的週日晚餐。Sweet Corn Pork with Rice is a staple in many Cha Chaan Teng menus across Hong Kong. Its combination of savory pork and sweet corn creates a delightful contrast of flavors that appeals to all taste buds. Plus, it’s a quick and easy meal that can be whipped up in no time, making it perfect for busy weeknights.

茶餐廳的歷史 History of Cha Chaan Teng

結論 Conclusion

在家嘗試這個簡化版的粟米肉粒飯,體驗香港茶餐廳的美味。這個食譜簡單易做,任何人都能輕鬆完成,而美味的成果定會讓你驚喜不已。Try out this simplified version of Sweet Corn Pork with Rice at home and experience a taste of Hong Kong’s beloved Cha Chaan Teng cuisine. The simplicity of this recipe ensures that anyone can make it, and the delicious result is sure to impress.

About Me

Hi, I’m Joyce. I’m originally from Hong Kong, passionate about food, cooking, and travel. Thanks for visiting! 我是Joyce,來自香港,熱愛美食、烹飪、旅遊,謝謝你瀏覽我的網頁!

Subscribe to My Blog 訂閱我的博客

As an Amazon Associate, I earn commission from qualifying purchases.

COPYRIGHT@2024 港姐廚房人生 Ms HK’s Kitchen

生炒糯米飯 Stir Fry Glutinous rice

只有想不到沒有做不到,你以為生炒糯米飯很難?讓這個港姐速成班教你如何在家裡炒出暖笠笠香噴噴的糯米飯啦!廚房新手都不用怕!

When there is a will, there is a way.  Do you think “Stir Fry Glutinous Rice” is very difficult to make (from raw to cook one pot in the pan!).  Let Ms HK show you how to do this at home.  Enjoy this warm dish for the upcoming autumn and winter!

分享幾個心得 Few tips to share:

心得一:米要用水泡浸透徹!Tips 1: Soak the rice thoroughly!

心得二:慢慢加雞湯,慢火慢慢炒 Tips 2: Add chicken broth gradually and stir fry in low heat

心得三:配料很重要!Tips 3: Other ingredients are also important!

生炒糯米飯 Stir Fry Glutinous rice


份量
Servings

準備時間
Prep Time

烹調時間
Cook Time

難度
Difficulty
24 hours30 mins★★★★

材料 INGREDIENTS

❑ 糯米一杯 1 cup glutinous rice

❑ 臘腸兩條 2 Chinese sausages

❑ 冬菇5-6隻 5-6 dried mushrooms 

❑ 雞湯適量 Chicken broth 

❑ 生抽老抽各適量 Light and dark soy sauce


做法 DIRECTIONS

  1. 糯米洗乾淨,用暖水先泡浸至少4小時 Rinse thoroughly the rice. Soak the rice in warm water for at least 4 hours
  2. 臘腸切粒 Cut sausages into dices
  3. 冬菇洗乾淨,用熱水泡浸至完全軟透 Wash the dried mushrooms. Soak in hot water until they are thoroughly soften
  4. 冬菇切粒,冬菇水可留著用來炒飯 Cut the mushrooms into dices. Optional to keep the mushroom water to stir fry the rice later
  5. 中火燒熱鍋 Heat the pan in medium heat
  6. 加入臘腸粒,先炒出油香 Add sausages and stir fry until oil comes out
  7. 加入冬菇粒,繼續炒 Add mushrooms and continue to stir fry
  8. 臘腸冬菇炒熟後,盛起備用 Stir fry until the sausages and mushrooms are cooked. Set aside
  9. 同一個鍋,加少許油,調至小中火,糯米瀝乾水,加入鍋裡炒 In the same pan, add a little oil. Low to medium heat. Drain the rice, add into the pan and stir fry.
  10. 炒至濕的米乾身後,加入適量雞湯,繼續炒至乾身 Stir fry until the rice is dry. Add some chicken broth and continue to stir fry until the rice is dry
  11. 如此類推,這樣炒至糯米熟透 Continue step 10 until the rice is fully cooked
  12. 加入炒熟的臘腸和冬菇,炒勻 Add cooked sausages and mushrooms. Stir well
  13. 先加入老抽把顏色調對,試味,再加入適量生抽,有需要可以加少許糖提味 Add dark soy sauce first to make the color right. Taste and add light soy sauce and/or sugar to season if needed.

其它重要提醒 Other Important Reminders:

  • 如果時間允許,糯米我一般泡浸過夜 I normally soak the rice overnight if time allows.
  • 泡過米的水不用留 Don’t keep the rice soaking water
  • 炒臘腸的時候,如需要可加少許油 Add a little oil, if needed, when you stir fry the sausages.
  • 一杯米的話,每次加雞湯是大概2湯匙,米多的話,每次加水要多一些,但加多了不用怕,慢慢煮就會乾,不要開大火 For 1 cup of rice, add 2 tbsp of chicken broth. If you add more than needed, no worry. Just keep cooking until the rice is dry. Don’t turn to high heat.
  • 用“一直”炒著,因為用的是小中火炒,“一直”炒,反而不容易讓食物受熱,可以略為讓把飯壓平一點,均勻受熱 Don’t keep stirring the rice. Since we are cooking in low-medium heat, if you keep stirring the rice, the heat cannot be transmitted through the rice. You can press the rice flat on the pan to let the rice being evenly cooked.
  • 炒糯米飯的時候千萬不要蓋鍋蓋,尤其是到最後差不多熟,覺得米熟不夠透,只能一直加雞湯慢慢煮 DON’T cover the pan with lid when you stir fry the rice especially when the rice is about to be thoroughly cooked. If you think the rice is not thoroughly cooked, just keep adding chicken broth to cook slowly.
About Me

Hi, I’m Joyce. I’m originally from Hong Kong, passionate about food, cooking, and travel. Thanks for visiting! 我是Joyce,來自香港,熱愛美食、烹飪、旅遊,謝謝你瀏覽我的網頁!

Subscribe to My Blog 訂閱我的博客

COPYRIGHT@2020 港姐廚房人生 Ms HK’s Kitchen

花椰菜披薩 Cauliflower Pizza

研究了很多不同的食譜,發現做花椰菜披薩的重點是要把花椰菜的水擠乾,越乾越能能花椰菜做成像一個麵團的感覺也能更好黏在一起。老實說比起一般披薩這個花椰菜披薩的披薩底其實要更容易做,同時也可以先把披薩底烤好,等晚餐前加上你喜歡的材料400F烤8-10分鐘就可以了。

I have researched and studied many different recipes.  I found out that the most important trick of making a good cauliflower pizza is to dry the cauliflower as much as you can to make it a dry dough.  This will help the cauliflower to stick together when you bake it.  Honestly, this dough is so much more easier than making a real pizza dough.  You can pre-make the pizza crust.  Before dinner, just put whatever toppings that you like and bake it for 8-10 mins at 400F to get the pizza done.

花椰菜披薩 Cauliflower Pizza


份量
Servings

準備時間
Prep Time

烹調時間
Cook Time

難度
Difficulty
220 mins30 mins★★★★

花椰菜披薩底 Cauliflower Pizza Crust

材料 INGREDIENTS

❑ 花椰菜一中碗 1 medium bowl Cauliflower

❑ 雞蛋一隻 1 Egg

❑ 帕馬森芝士三到四湯匙 3-4 tbsp Parmesan Cheese 

❑ 鹽、黑胡椒、乾牛至各一茶匙 1 tsp each Salt, Black Pepper, Dried Oregano


做法 DIRECTIONS

  1. 花椰菜洗乾淨切小塊,用攪拌機攪碎 Wash and cut the cauliflower into small pieces.  Blend the cauliflower in a food processor
  2. 放入微波爐4分鐘左右 Heat up the cauliflower in microwave for about 4 mins
  3. 用乾淨的廚房布包著花椰菜擠乾水  Use a clean kitchen cloth (you can use cheese cloth) to squeeze the water out from the cauliflower.  Try to squeeze as much as you can to make the cauliflower dough dry
  4. 加一隻雞蛋、兩三湯匙的parmesan cheese、適量的鹽、黑胡椒和乾香草碎跟花椰菜混合 Add one egg, 2-3 tbsp parmesan cheese, some salt, black pepper and italian herbs in the cauliflower and mix it well to become a dough
  5. 烤盤放一張烘培紙,把花椰菜團壓成圓形或者長方形放上去,400F烤20分鐘 Form your dough in a round or rectangle shape. Bake at 400F for 20 mins.

Cauliflower Pizza Toppings 花椰菜披薩餡料

基礎材料 BASIC INGREDIENTS:

洋蔥,蕃茄,甜椒,披薩醬(也可以用意粉醬代替),馬蘇里拉芝士(也可以加上各式你喜愛的芝士)Onion, Tomato, Sweet Pepper, Pizza Sauce (or you can use pasta sauce as a substitute), Mozzarella Cheese (plus any kind of cheese you like)

更多餡料選擇 MORE TOPPINGS CHOICES :

火腿,意大利辣肉腸,雞胸肉,菠菜,意大利青醬…任你喜歡的各式材料 Ham, Pepperoni, Chicken Breast, Spinach, Pesto Sauce…whatever you like

做法 DIRECTIONS

披薩底做好,你就可以跟做一般pizza一樣,隨你自己喜歡放任何材料,再放進去烤箱400F烤8-10分鐘就可以啦!After you’ve done the pizza crust, you can add any toppings that you love like making a regular pizza.  Bake at 400F for 8-10mins and a lovely pizza will be ready!

About Me

Hi, I’m Joyce. I’m originally from Hong Kong, passionate about food, cooking, and travel. Thanks for visiting! 我是Joyce,來自香港,熱愛美食、烹飪、旅遊,謝謝你瀏覽我的網頁!

Subscribe to My Blog 訂閱我的博客

COPYRIGHT@2020 港姐廚房人生 Ms HK’s Kitchen

節瓜雞絲炒螺絲粉 Stir Fry Rotini with Zucchini and Chicken

用豉油炒意粉?香港獨有特色 – 豉油西餐!

究竟豉油西餐是西餐還是中餐?

大家聽過豉油西餐嗎?大家吃過豉油炒意粉嗎?

Have you heard of Soy Sauce Western Food? Have you had stir fry pasta with soy sauce?

豉油西餐是香港的獨有特色,讓港姐告訴你更多香港這個獨有的飲食文化、港姐港媽怎樣用豉油炒意粉還有港姐在他鄉尋找豉油的故事! 金X牌的油膏跟大家推薦過,那麼港姐是否也推薦他們的老抽呢?想知道就要點擊近來看看啦!

Soy Sauce Western Food is an unique food culture in Hong Kong. Let Ms HK tell you more about this, how Ms HK and her mom stir fry pasta with soy sauce and Ms HK’s story of finding the right soy sauce in US!

節瓜雞絲炒螺絲粉 Stir Fry Rotini with Zucchini and Chicken


份量
Servings

準備時間
Prep Time

烹調時間
Cook Time

難度
Difficulty
110 mins20 mins

材料 INGREDIENTS

❑ 雞胸肉半塊 Half piece Chicken Breast

❑ 節瓜半條 Half Zucchini

❑ 蘑菇5-6隻 5-6 heads mushroom 

❑ 螺絲粉一碗 1 bowl Rotini

❑ 生抽、老抽各1-1.5湯匙 1-1.5 tbsp each Light and Dark Soy Sauce


做法 DIRECTIONS

  1. 燒開水,加鹽,按照包裝的時間煮螺絲粉 Boil water.  Add salt.  Cook the rotini according to the instruction on the package
  2. 雞胸切絲 Cut chicken breast into shreds
  3. 用豉油、糖和粟粉醃一下雞肉 Marinate chicken with soy sauce, sugar and cornstarch
  4. 節瓜削皮,去瓤,切絲 Remove skin, pulp of zucchini and cut into shreds
  5. 蘑菇切片 Cut mushrooms into slices
  6. 中火把油燒熱 Heat up some oil in medium heat
  7. 加入雞絲,略炒 Add chicken and stir fry
  8. 加入節瓜,炒勻 Add zucchini and stir well
  9. 蓋上鍋蓋,把節瓜煮軟 Cook with lid till zucchini is soften
  10. 加入蘑菇片,炒勻 Add mushroom slices and stir well
  11. 加入煮好的螺絲粉,炒勻 Add cooked rotini and stir well
  12. 加入生抽、老抽炒勻,有需要可以加適量的糖 Season with soy sauce. Add sugar, if needed

其它可選擇的材料 OTHER INGREDIENTS OPTIONS:

豬肉、牛肉、火腿、青椒、洋蔥等 Pork, Beef, Ham, Bell Peppers, Onion etc.

About Me

Hi, I’m Joyce. I’m originally from Hong Kong, passionate about food, cooking, and travel. Thanks for visiting! 我是Joyce,來自香港,熱愛美食、烹飪、旅遊,謝謝你瀏覽我的網頁!

Subscribe to My Blog 訂閱我的博客

As an Amazon Associate, I earn commission from qualifying purchases.

COPYRIGHT@2024 港姐廚房人生 Ms HK’s Kitchen

究竟三杯雞是哪三杯?Three-Cup Chicken!

港姐跟台灣有著不解之緣,港姐愛台灣,除了因為許多台灣朋友,更多是因為台灣實在有太多好吃的!

台灣的三杯雞是我第一個學會的台灣菜,這個經典的台灣菜,基本上是隨時都能在家裡做,疫情下去不了台灣,在家自己做台灣假裝在台灣吧!

Ms HK has a special connection with Taiwan.  I love Taiwan!  Not just because I have a lot of Taiwanese friends but also (and most importantly) I love Taiwanese food.

Three-Cup Chicken is the first Taiwanese dish I learnt.  This is classic while easy to be made at home.  Due to COVID-19, we can’t travel to Taiwan but we can “pretend” in Taiwan!

三杯雞 Three Cup Chicken


份量
Servings

準備時間
Prep Time

烹調時間
Cook Time

難度
Difficulty
215 mins20 mins★★

材料 INGREDIENTS

❑ 去皮去骨雞腿肉三塊;3 Boneless and skinned chicken thigh

❑ 薑片10-20片;10-20 slices of ginger

❑ 蒜4顆切片;4 garlic cloves, sliced 

❑ 麻油、米酒、油膏各一湯匙;Sesame oil, rice wine and soy paste, 1 tbsp each


做法 DIRECTIONS

  1. 雞腿肉切大塊,先中火兩面煎香,再炒熟 Cut chicken thigh into bite size pieces.  Cook the chicken in medium heat until both sides are golden brown and chicken is cooked
  2. 中小火,鍋裡先燒熱麻油,加入薑片蒜片爆香 Low medium heat.  Add sesame oil.  Add ginger and garlic.  Stir Fry.
  3. 放入煮熟的雞肉,加入米酒、油膏,蓋上鍋蓋,中小火煮5分鐘  Add cooked chicken.  Add rice wine and soy paste.  Cover the lid.  Cook in low medium heat for 5 mins
  4. 放入九層塔,拌勻即可  Finish by adding basil.  Serve warm

沒有油膏可以用蠔油代替,但需要先用少許糖、生粉、水和蠔油調好味,就是要弄得稍微甜一點和稀一點。If you don’t have soy paste, you can substitute with oyster sauce. Add a little sugar, cornstarch and water to mix with the oyster sauce to make it slightly sweet and less thick.

About Me

Hi, I’m Joyce. I’m originally from Hong Kong, passionate about food, cooking, and travel. Thanks for visiting! 我是Joyce,來自香港,熱愛美食、烹飪、旅遊,謝謝你瀏覽我的網頁!

Subscribe to My Blog 訂閱我的博客

As an Amazon Associate, I earn commission from qualifying purchases.

COPYRIGHT@2024 港姐廚房人生 Ms HK’s Kitchen

咖哩雜菜 Curry Vegetables

我一直都是咖哩的忠實粉絲,泰式、印度式甚至是港式的咖哩我都愛,但一直做咖哩不是用雞肉就是牛肉,但其實素咖哩也可以非常的美味,重點是可以好好利用家裡剩下的各式蔬菜!

咖哩味道好又健康,下個素食日,你就來試試做這個咖哩雜菜吧!

I’m always a big fan of all kinds of curry, Thai, Indian or even HK style.  We normally cook curry with chicken or beef.  Actually, vegetarian curry is also very delicious.  Most importantly, you can use any of the leftover vegetables you’ve got at home.

Curry is not just delicious but also healthy.  Let’s try this Curry Vegetables in your next vegetarian day!

咖哩雜菜 Curry Vegetables


份量
Servings

準備時間
Prep Time

烹調時間
Cook Time

難度
Difficulty
220 mins30 mins★★

材料 INGREDIENTS

❑ 各式你在家可以找到的蔬菜,以下都是好的選擇。Any kind of vegetables that you can find at home.  Below are some good options.

洋蔥、胡蘿蔔、各式彩椒、豆角、各式菇類、薯仔、蕃薯、南瓜甚至豆腐 Onion, carrot, red/yellow/orange bell pepper, green beans, mushroom, potato/sweet potato, pumpkin or even tofu (beancurd)

❑ 咖哩醬50克;50g Curry Paste;

❑ 椰奶一杯;1 cup Coconut Milk 


做法 DIRECTIONS

  1. 先將容易熟的蔬菜用橄欖油炒熟,盛起備用 First stir fry vegetables that are more easily cooked.  Set aside
  2. 再炒需要時間煮的蔬菜,譬如蕃薯、胡蘿蔔,加入咖哩醬炒勻後,倒入熱水(要能蓋住蔬菜),煮大概10-15分鐘 Then stir fry those need longer time to cook e.g. sweet potato and carrots.  Add curry paste.  Stir well.  Add hot water to cover the vegetables.  Cook with lid for 10-15 mins.
  3. 再放回炒過的蔬菜,加入椰奶 Then, add back the cooked vegetables.  Add coconut milk. 
  4. 煮5分鐘,有需要加鹽調味 Cook with lid for another 5 mins.  Season with salt if needed.
  5. 最後用生粉水勾芡 Thicken the sauce with cornstarch water

重要提醒 Important Reminders:

  • 泰式咖哩醬是好選擇,做蔬菜,建議用紅咖哩或黃咖哩 Thai curry is a good choice.  I would recommend red or yellow curry.
  • 沒有椰奶可以用淡奶油代替 You can substitute coconut milk with heavy cream.
About Me

Hi, I’m Joyce. I’m originally from Hong Kong, passionate about food, cooking, and travel. Thanks for visiting! 我是Joyce,來自香港,熱愛美食、烹飪、旅遊,謝謝你瀏覽我的網頁!

Subscribe to My Blog 訂閱我的博客

As an Amazon Associate, I earn commission from qualifying purchases.

COPYRIGHT@2024 港姐廚房人生 Ms HK’s Kitchen

墨西哥牛肉卷餅 Beef Taco

How to make Beef Taco? 墨西哥牛肉卷餅怎麼做?|在家也能做出餐廳美食!

在美國,墨西哥菜隨處可見,但其實也可以在家裡做啊!In US, you can find Mexican food restaurants everywhere.  You can easily make some Mexican food at home!

 《好物推薦 Favorite Finds》 – 不沾鍋 Ceramic Frying Pan

墨西哥牛肉卷餅 Beef Taco


份量
Servings

準備時間
Prep Time

烹調時間
Cook Time

難度
Difficulty
230 mins15 mins★★★

材料 INGREDIENTS

❑ 牛肉餡 300克;Ground Beef 300g

❑ 蒜末 1瓣;Garlic 1 glove, chopped

❑ 卷餅 4片;Taco shells 4 

煮牛肉餡的調料 SPICES FOR THE BEEF:

❑ 孜然粉,甜辣椒粉,辣椒粉,洋蔥粉,蒜粉各一茶匙;Cumin, Paprika, Chili Powder, Onion Powder and Garlic Powder, 1 tsp each

❑ 鹽、黑胡椒適,量調味用;Salt and pepper to season

莎莎醬材料 INGREDIENTS OF SALSA SAUCE

❑ 洋蔥 1/4個,切碎;Onion 1/4, chopped

❑ 牛油果 1個,切粒;Avocado 1, diced

❑ 蕃茄 1個,切粒;Tomato 1, diced

❑ 九層塔葉 數片,切碎;Basil leaves Few, chopped


牛肉餡做法 DIRECTIONS TO COOK BEEF:

  1. 中火燒熱適量橄欖油 Heat up some olive oil in medium heat
  2. 加入牛肉餡,炒熟 Add beef and stir fry till cooked
  3. 加入蒜末繼續翻炒 Add garlic and continue to stir fry
  4. 加入所有調味料繼續翻炒 Add all spices (including salt and pepper) and continue to stir fry

莎莎醬做法 DIRECTIONS TO MAKE SALSA SAUCE:

  1. 洋蔥粒用檸檬汁醃至少一小時,去掉辣味 Marinate the onion with lemon juice for at least 1 hour to remove the spiciness
  2. 將蕃茄粒、牛油果粒和九層塔碎加入醃好的洋蔥 Add tomato dices, avocado dices and basil in the onion and mix well
  3. 加鹽和黑胡椒粉調味 Season with salt and pepper

最後,按順序先放牛肉餡、莎莎醬和芝士,就組裝完成美味的墨西哥牛肉卷餅啦!Finally, assemble the taco with beef, salsa sauce and some shredded cheese!

About Me

Hi, I’m Joyce. I’m originally from Hong Kong, passionate about food, cooking, and travel. Thanks for visiting! 我是Joyce,來自香港,熱愛美食、烹飪、旅遊,謝謝你瀏覽我的網頁!

Subscribe to My Blog 訂閱我的博客

As an Amazon Associate, I earn commission from qualifying purchases.

COPYRIGHT@2024 港姐廚房人生 Ms HK’s Kitchen

義大利雜菜湯 Minestrone

Minestrone義大利雜菜湯應該是大家很熟悉的西式湯,我自己就很喜歡。疫情下,不能去義大利,想去個義大利餐廳吃飯也要擔心到安全,那麼就自己在家裡做吧!

I believe that Minestrone is the the most popular western soup among Asian.  It’s one of my favourite soups.  It seems impossible to travel in 2020.  Can’t go to Italy?  Or even worry dining out at restaurants?  This soup is actually pretty easy to make at home.  Let’s try!

義大利雜菜湯 Minestrone


份量
Servings

準備時間
Prep Time

烹調時間
Cook Time

難度
Difficulty
220 mins30 mins★★

材料 INGREDIENTS

❑ 胡蘿蔔 2根;2 Carrots

❑ 西芹 4條;4 stalks of celery

❑ 洋蔥 1個;1 onion

❑ 椰菜 2片;2 leaves of cabbage

❑ 蒜 1瓣;1 glove of garlic

❑ 罐頭蕃茄 1罐;1 can tomato

❑ 罐頭白豆 1罐;1 can white beans


做法 DIRECTIONS

  1. 中火燒熱油 Heat up some oil in medium heat
  2. 放胡蘿蔔,中火炒2分鐘 Add carrot, stir fry for 2 mins
  3. 加蒜末,繼續炒 Add garlic and continue to stir fry
  4. 再加入西芹粒,繼續炒幾分鐘 Add diced celery.  Continue to stir fry for few mins
  5. 加入洋蔥,繼續炒至蔬菜變軟 Add onion and continue to stir fry till the veggies are soften
  6. 加入椰菜梗 Add the sliced cabbage stems
  7. 加入白豆(含水)Add the white beans, including the water
  8. 加入蕃茄(含水)Add diced tomato, including water
  9. 加兩片香葉 Add two bay leaves
  10. 黑胡椒調味 Season with black pepper
  11. 再加入椰菜絲 Add cabbage
  12. 加入兩杯的素高湯 Add 2 cups of vegetable broth
  13. 蓋上鍋蓋煮5分鐘 Cover the lid and cook for 5 mins
  14. 加入義大利麵,再煮10分鐘 Add pasta and cook for 10 mins
  15. 煮到湯比較濃稠,加鹽調味,就可以啦!After 10 mins, the soup will be thicken.  Season with salt. It’s ready to serve!
About Me

Hi, I’m Joyce. I’m originally from Hong Kong, passionate about food, cooking, and travel. Thanks for visiting! 我是Joyce,來自香港,熱愛美食、烹飪、旅遊,謝謝你瀏覽我的網頁!

Subscribe to My Blog 訂閱我的博客

As an Amazon Associate, I earn commission from qualifying purchases.

COPYRIGHT@2024 港姐廚房人生 Ms HK’s Kitchen

鮮茄雞絲飯 Shredded Chicken with Fresh Tomato on Rice

什麼是碟頭飯?有吃過日式的丼吧,這可以說是港式的丼,不是不在碗裡,在碟裡,因此也就叫碟頭飯,普通話一般叫蓋澆飯,碟頭飯有很多種,有傳統的燒味飯,有典型港式小菜類,也有所謂豉油西餐式的,就像我今天跟大家分享的鮮茄雞絲飯,其實是另外一個經典港式燴飯“鴛鴦炒飯”的簡易版。“鴛鴦炒飯”裡有白汁紅汁,這個鮮茄雞絲就是紅汁的那一邊,簡單一點配白米飯而不是炒飯,一樣好吃。

小時候吃鴛鴦炒飯我都只愛吃紅汁(本人小時候對白色食物有種恐懼),這個鮮茄雞絲飯完全滿足了港姐我這個香港胃,在家也可以做出茶餐廳風味啊!

What is rice dish?  Japan has donburi (rice bowl).  This is kind of a HK style one but it’s on a plate not a bowl.  Traditional HK style rich dish has lots of varieties such as BBQ rice dish (HK BBQ – BBQ pork, soy sauce chicken, crispy pork belly etc.), rice dish with traditional HK stir fry or even what is so called “Soy Sauce Western Dish”.  This shredded chicken with fresh tomato on rice is actually a simplified version of another traditional HK style rice dish called “Yuan Yang Fried Rice”.  “Yuan Yang Fried Rice” is a combination of two sauces – white (creamy) and red (tomato) sauces.  This simplified version has only the tomato sauce and served with white rice instead of fried rice.

When I was a kid, I only like “red” sauce (I was afraid any food in white color).  This chicken tomato rice dish makes me very happy when I miss home.  You can also make something Chan Chaan Teng like (HK style Tea restaurant) at home.

鮮茄雞絲飯 Shredded Chicken with Fresh Tomato on Rice


份量
Servings

準備時間
Prep Time

烹調時間
Cook Time

難度
Difficulty
120 mins30 mins★★

材料 INGREDIENTS

❑ 雞肉1件;1 Chicken thigh

❑ 洋蔥半個;1/2 Onion

❑ 番茄一個;1 Tomato 

❑ 白飯一碗;1 bowl Rice

雞肉醃料 SEASONINGS FOR CHICKEN:

❑ 生抽半湯匙;1/2 tbsp Soy sauce

❑ 麻油一茶匙;1 tsp Sesame oil

❑ 砂糖半茶匙;1/2 tsp Sugar

❑ 料酒 半湯匙;1/2 tsp Cooking wine

❑ 粟粉半茶匙 ;1/2 tsp Cornstarch

調味汁料 SAUCE:

❑ 茄汁三湯匙;3 tbsp Ketchup

❑ 黃砂糖一湯匙;1 tbsp Brown sugar

❑ 清水半量杯;1/2 cup Water

❑ 幼鹽1/4 茶匙;1/4 tsp Salt

❑ 粟粉 半茶匙;1/2 tsp Cornstarch


做法 DIRECTIONS

  1. 先把雞腿肉切成絲 First cut the chicken thigh into thin slices
  2. 洋蔥順紋切絲,蕃茄切大塊 Cut the onion into slices along the grain.  Cut tomato into pieces
  3. 先加入調料醃製雞絲15-20分鐘 Add all the seasonings to marinate the shredded chicken for 15-20mins
  4. 混合好所有的醬汁調料 Prepare the tomato sauce
  5. 中火燒熱油,放雞絲,中火炒,炒熟後,盛起備用 Heat up some oil in medium heat.  Add shredded chicken and stir fry. After chicken is cooked, set aside
  6. 再燒熱一點油,放洋蔥 把洋蔥炒軟 Heat up some more oil and add onion.  Stir fry the onion until soften.  
  7. 加入蕃茄,繼續炒  Add tomato and continue to stir fry
  8. 雞絲回鍋  Add the cooked chicken
  9. 炒勻後,加入醬汁  Stir well and add sauce
  10. 拌勻,慢火煮至濃稠  Stir well.  Simmer in low heat until sauce is thicken
  11. 如需要,加粟粉水收汁 If needed, thicken the sauce with some cornstarch

配上白米飯就完美啦!It’s just perfect to serve with some rice!

About Me

Hi, I’m Joyce. I’m originally from Hong Kong, I’m passionate about food, cooking, and travel. Thanks for visiting! 我是Joyce,來自香港,熱愛美食、烹飪、旅遊,謝謝你瀏覽我的網頁!

Subscribe to My Blog 訂閱我的博客

As an Amazon Associate, I earn commission from qualifying purchases.

COPYRIGHT@2024 港姐廚房人生 Ms HK’s Kitchen

Design a site like this with WordPress.com
Get started